‘Manage Visitors’ allows you to book, approve and reject visitors. Visitors are either invited or can be walk-ins.

The  Visitors Management can be accessed from the app by clicking on the ‘App Drawer’ and then clicking on the ‘Manage Visitors’  button (marked in green). See the image below.

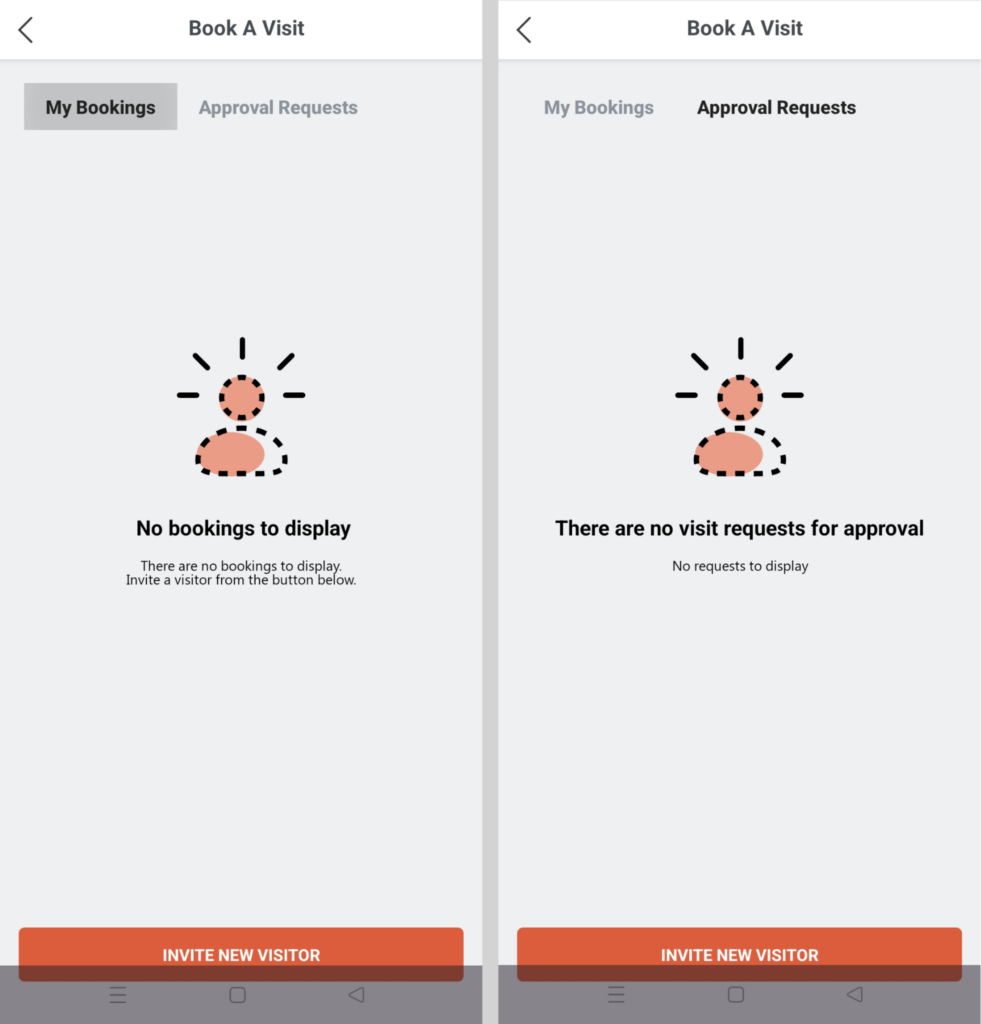
Clicking on the ‘Manage Visitors’  button takes you to the following screen –

The screen is divided into two tabs ‘My Bookings’ and ‘Approval Requests’; the ‘Invite new visitor’ button which is commonly available, facilitates inviting visitors on a particular date and time. The ‘My Bookings’ tab will display the people you have invited, and the ‘Approval Requests’ tab will display the visitors seeking permission to visit.

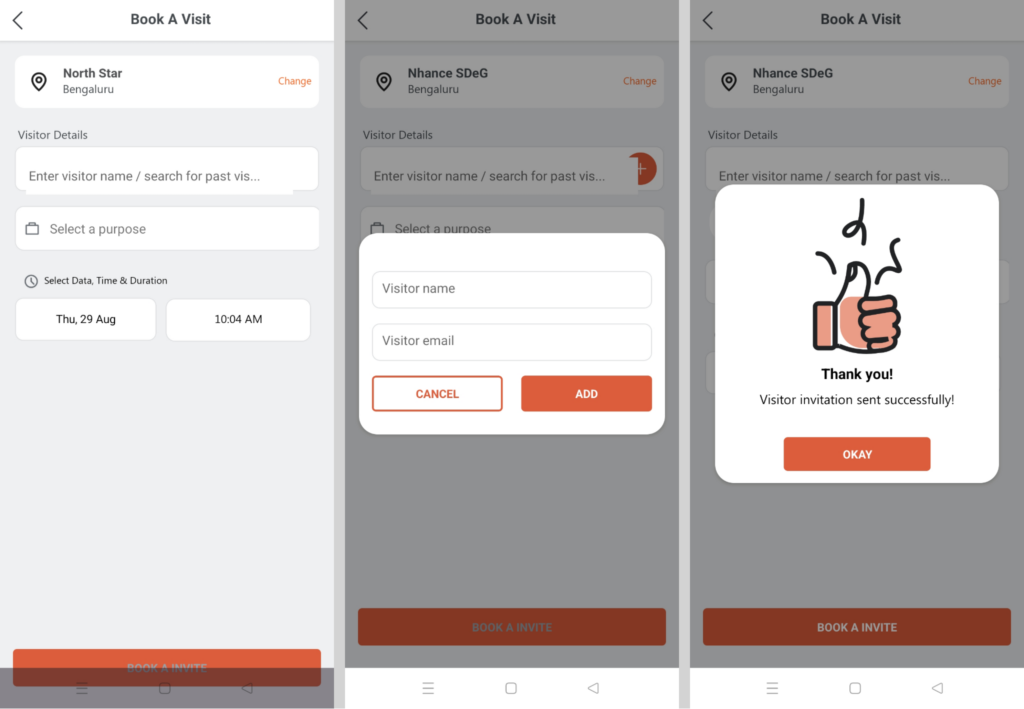
Clicking the ‘Invite new visitor’ button will display the following screen (1st screen from the left) –

The screen displays the following:

1. Current building name and location. The ‘Change’ button will help you select the relevant branch and location.
2. Visitor details: If the visitor is new, enter the visitor’s name and click on ‘+’ and a pop-up will open (2nd screen from the left) enter the name and email address of the visitor and click the ‘Add’ button. The visitor name will be shown below the ‘Visitor details’ text field along with the ‘x’ mark. You can cancel the visitor if you don’t need them. You can add multiple visitors also.
3. Select a purpose: Here you can select any option from the given 3 options i.e. Interview, Official Business and Meeting.
4. Select the relevant date and time of the visit.
5. Click on ‘Book a invite’ button to create the invitation.
6. A ‘Thank You’ message will appear after the invitation has been sent.

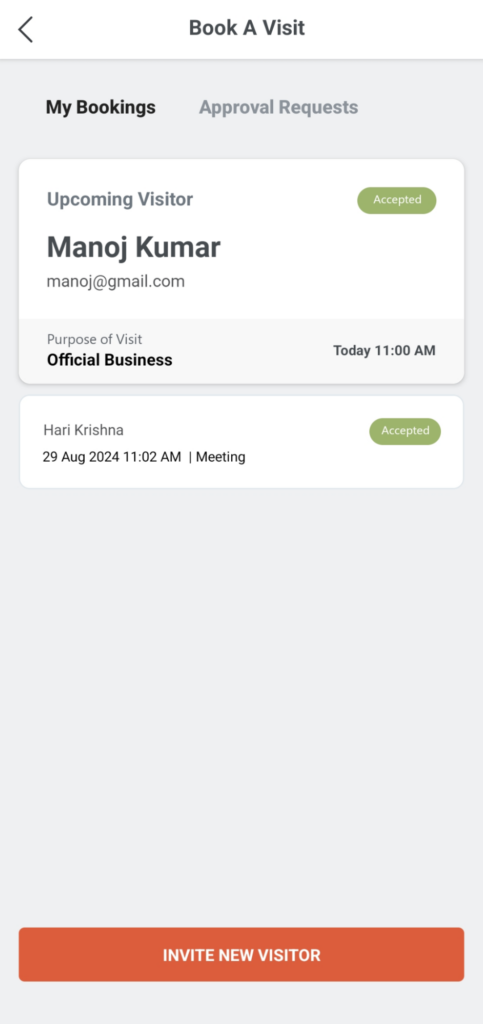
All the invites which are sent by you are displayed in the ‘My Bookings’ tab. See the screenshot below.

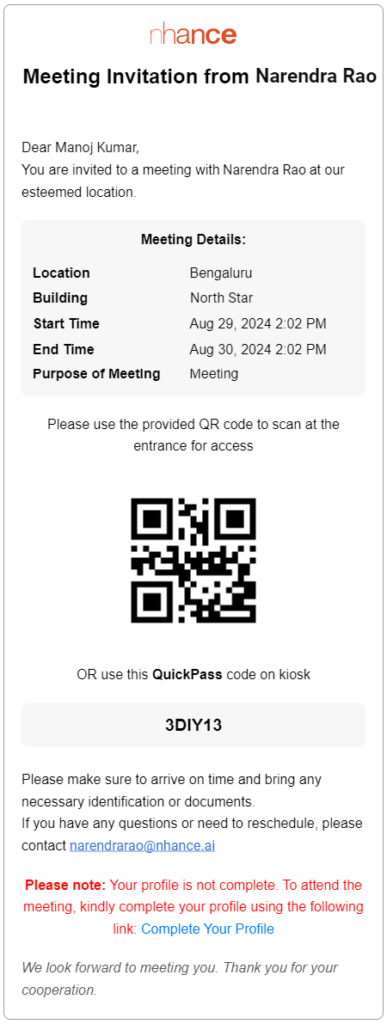
Below is the screenshot of the invitation.

The screen displays the following:

1. Tenant logo
2. Name of the invitee (i.e., you)
3. Name of the person who invited you to the meeting
4. Location, Name of the building, Start and End time, and Purpose of the meeting.
5. ‘QR’ code and ‘QuickPass’ code will be provided for scanning or entering the code in the Kiosk (Tablet) provided by the receptionist during the time of the visit.
6. The visitor needs to fill in the information about them by clicking on the ‘Complete Your Profile’ link.
7. An OTP will be sent to you by mail. Enter the OTP in the Kiosk and after that, you have to fill in your details. After that, you will be provided with the badge.

If the appointment request has been rejected or cancelled you will be sent an email stating that the appointment has been cancelled. See the screenshot below.

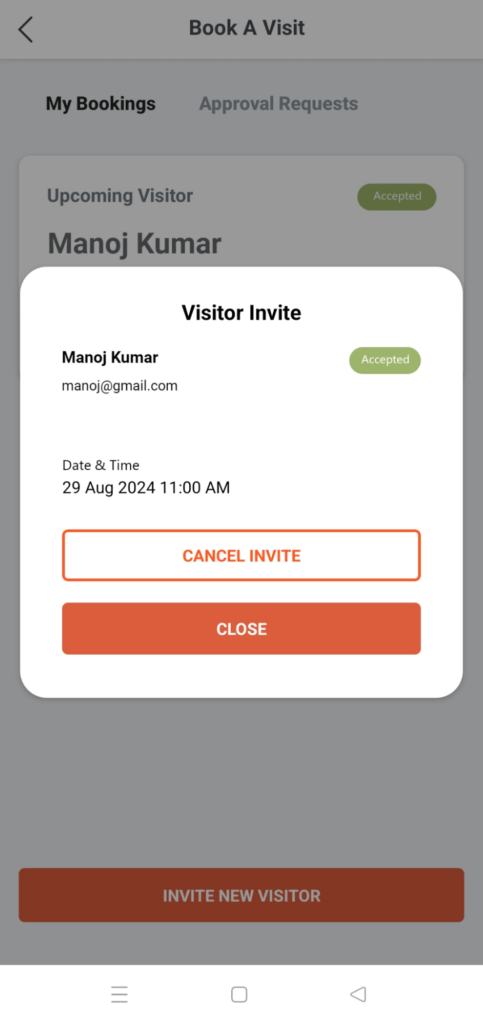
The invite cancellation can be made by clicking on a particular appointment and in turn it will open a pop-up and click on the ‘Cancel Invite’ button. See the screenshot below.

Visited 37 times, 1 visit(s) today

Comments are closed.

Close Search Window