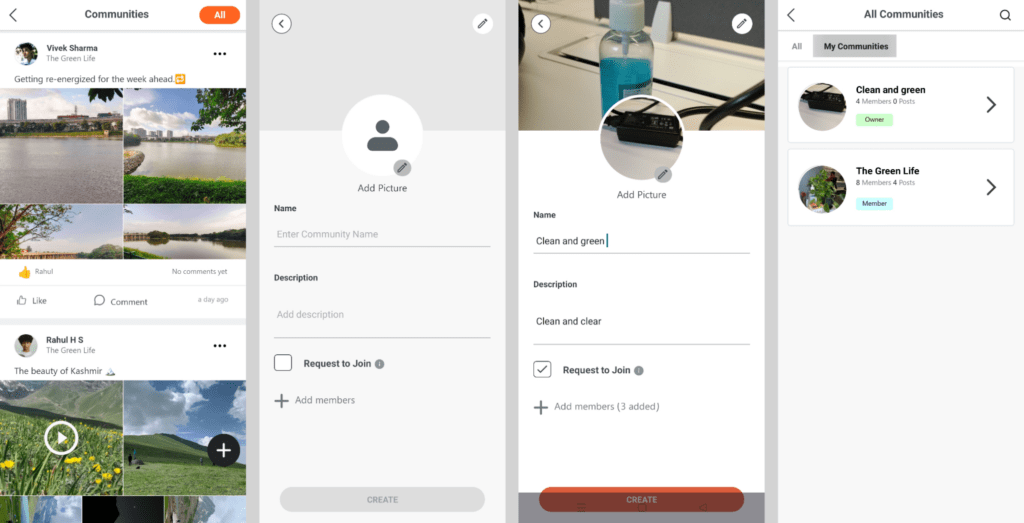
Communities microservice allows you to create and manage communities. It is useful for making connections and sharing information within communities.
Communities can be accessed from the dashboard by clicking on the ‘App Drawer’ and then clicking on the ‘Communities’ button (marked in green). See the image below.
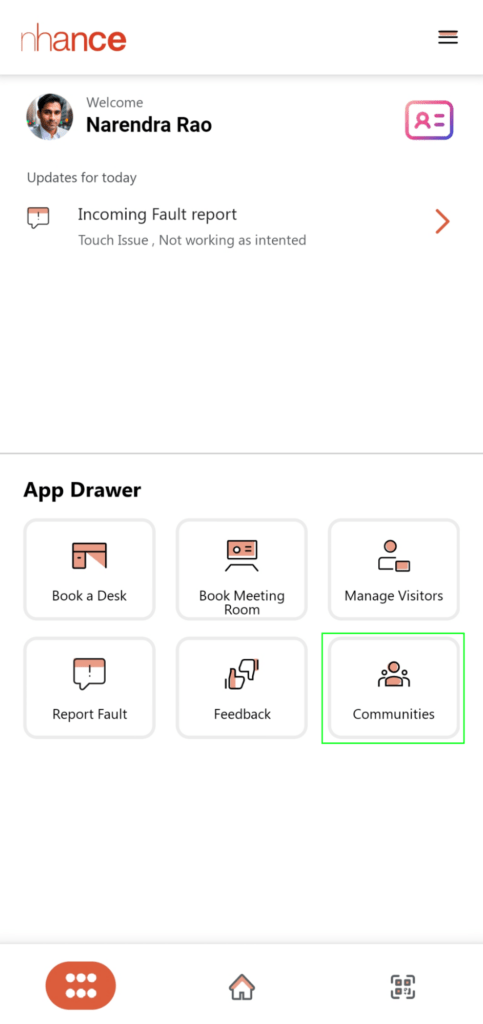
When you click on the ‘Communities’ button you will be presented with the following screen.
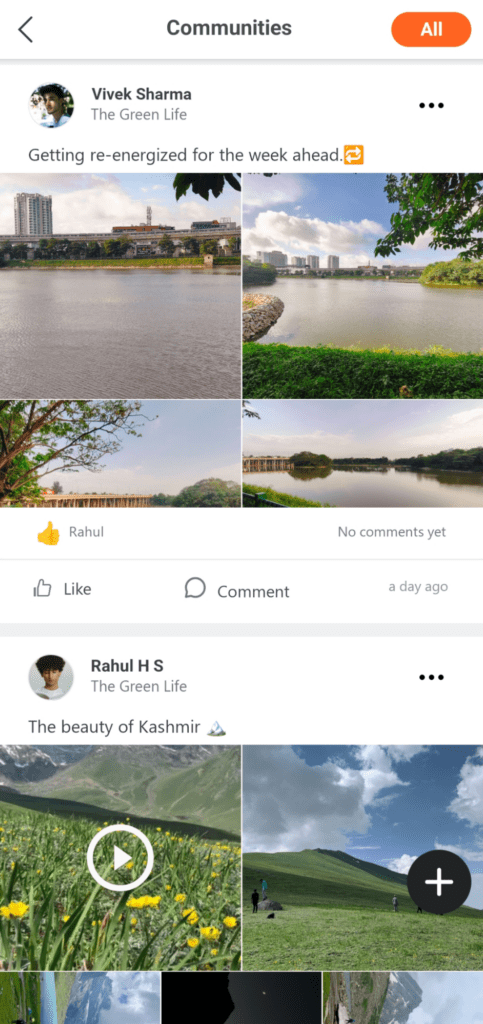
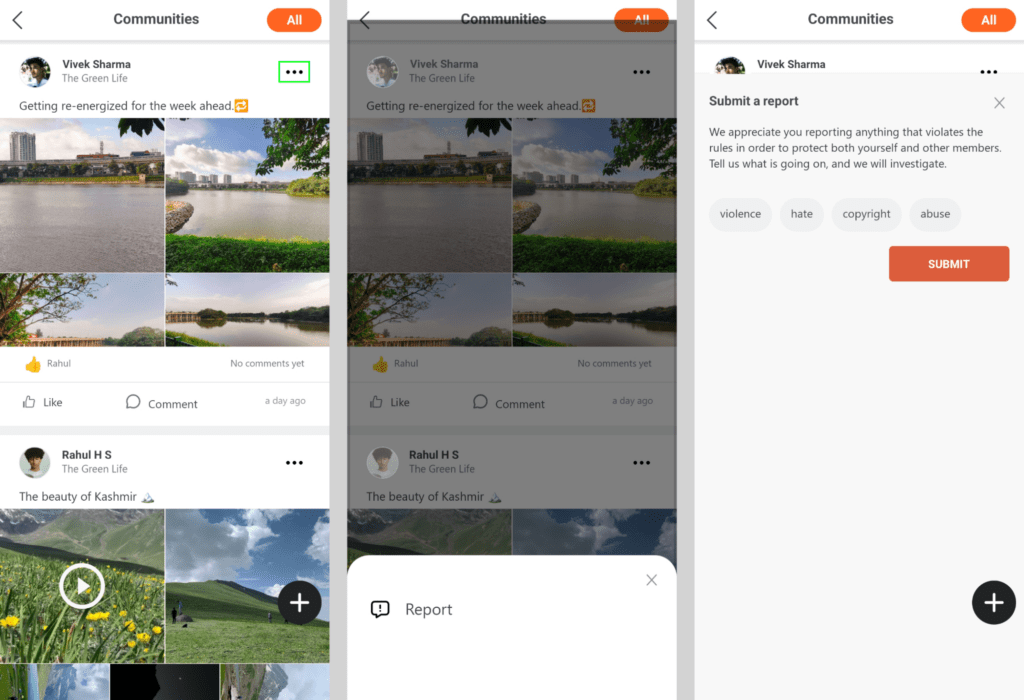
Here you will see all the posts of the members, and people who liked the post and commented on it.
When you click on ‘All’ button, you will presented with the following screen.
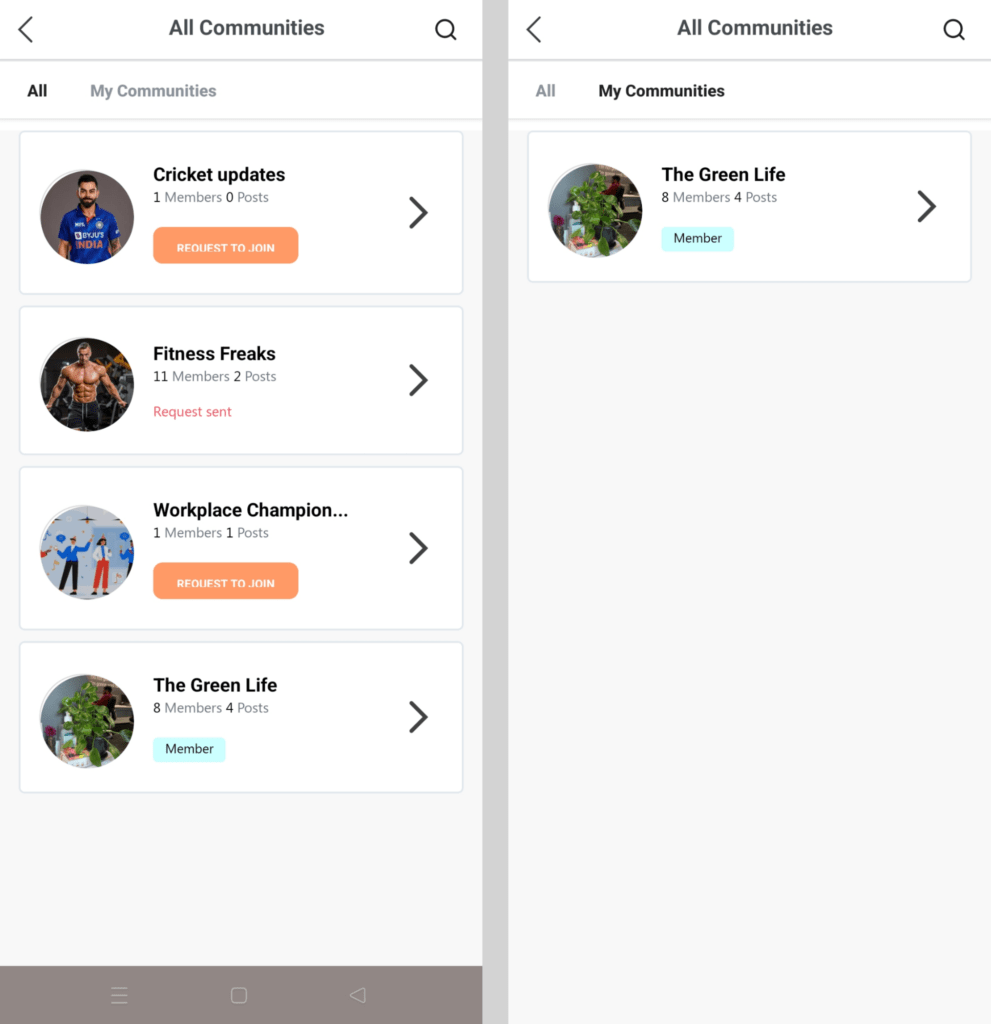
In this screen, you will see
1. List of communities available, the number of people who have joined that community, and the total number of posts people have posted.
2. Displays you as a ‘Member’ if you have joined a particular community.
3. If you have sent a request to join a community, the status will show as ‘Request sent’.
4. If you are not part of a community it will show the ‘Request to join’ button.
5. My Communities: This tab will display all the communities you are a member of.
To ‘Report’ any post, click on the 3 dots (marked in green) and a pop-up will appear (screen with black overlay). Click on ‘Report’ to submit a report (screen on the right side)
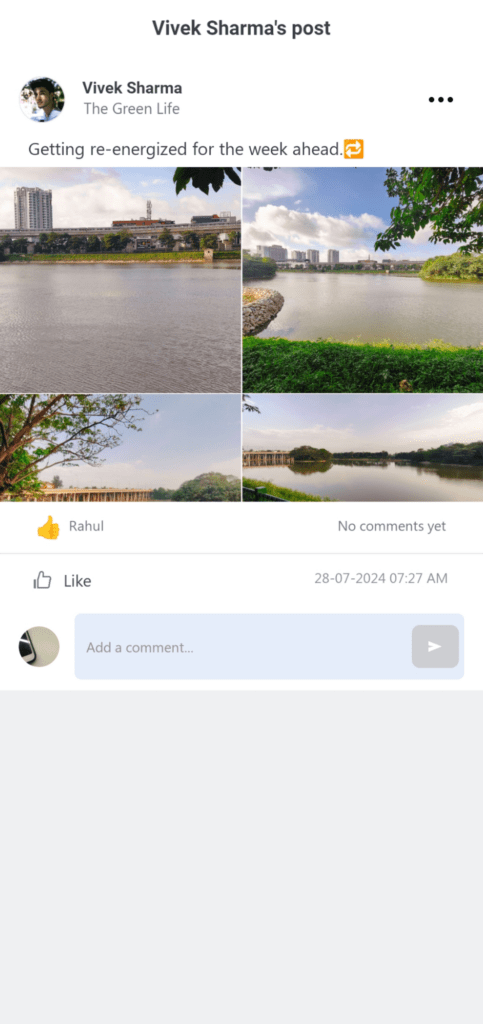
To comment on a post, click on the ‘Comment’ button. See the screenshot below.
When you want to join a community click on the ‘Request to join’ (marked in green) button.
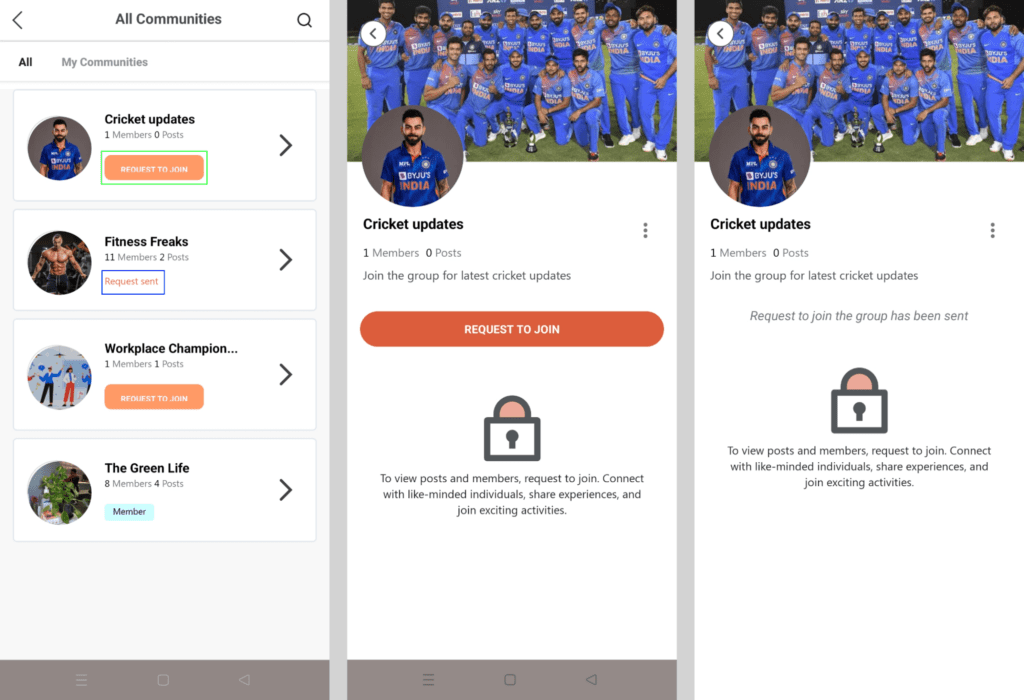
You can see the ‘Request to join’ button inside the community page also that you have not joined. You will get a message ‘Request to join the group has been sent’ after you click to join (see the right-side image). Also, you will see a ‘Request sent’ message (marked in blue in the left-side image) on the ‘All Communities’ page.
You can ‘Report’ this community by clicking the kebab menu (marked in green), and a pop-up will appear and you can click on the button ‘Report Community’. See the screenshot below.
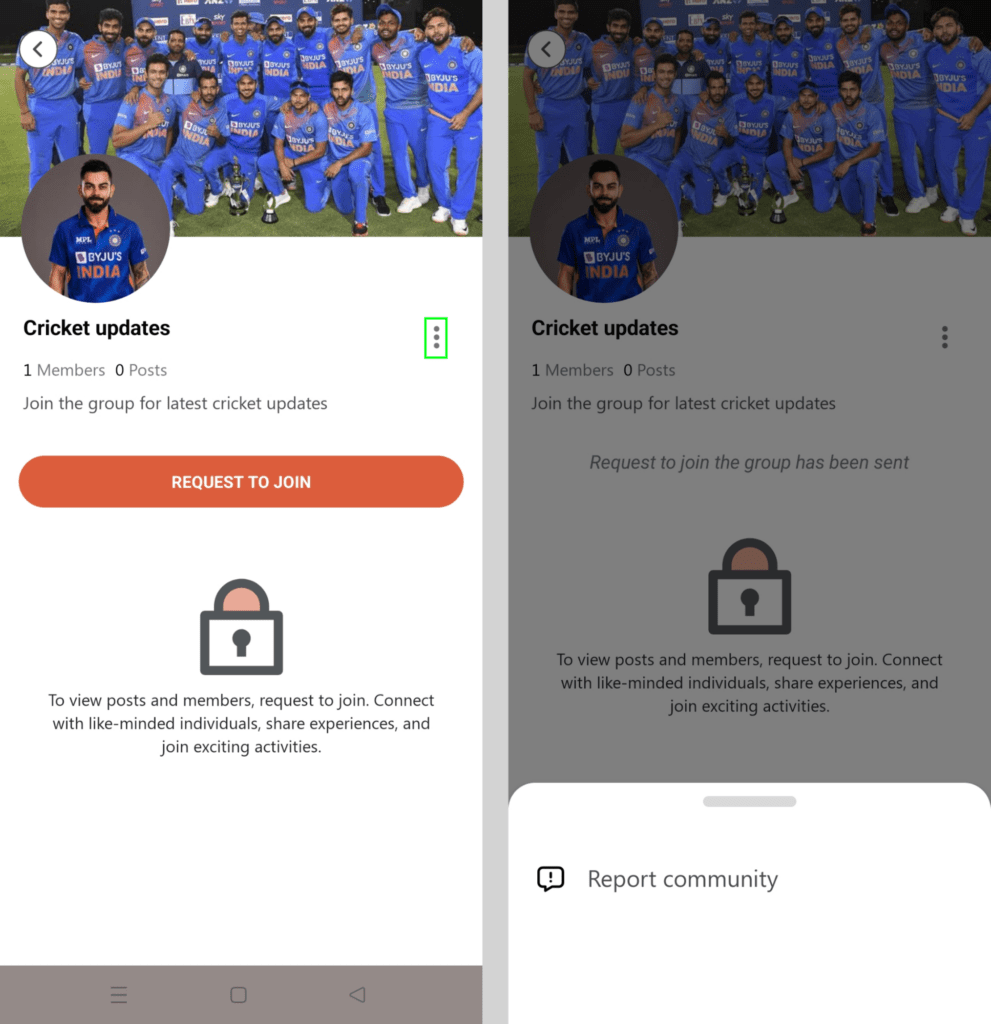
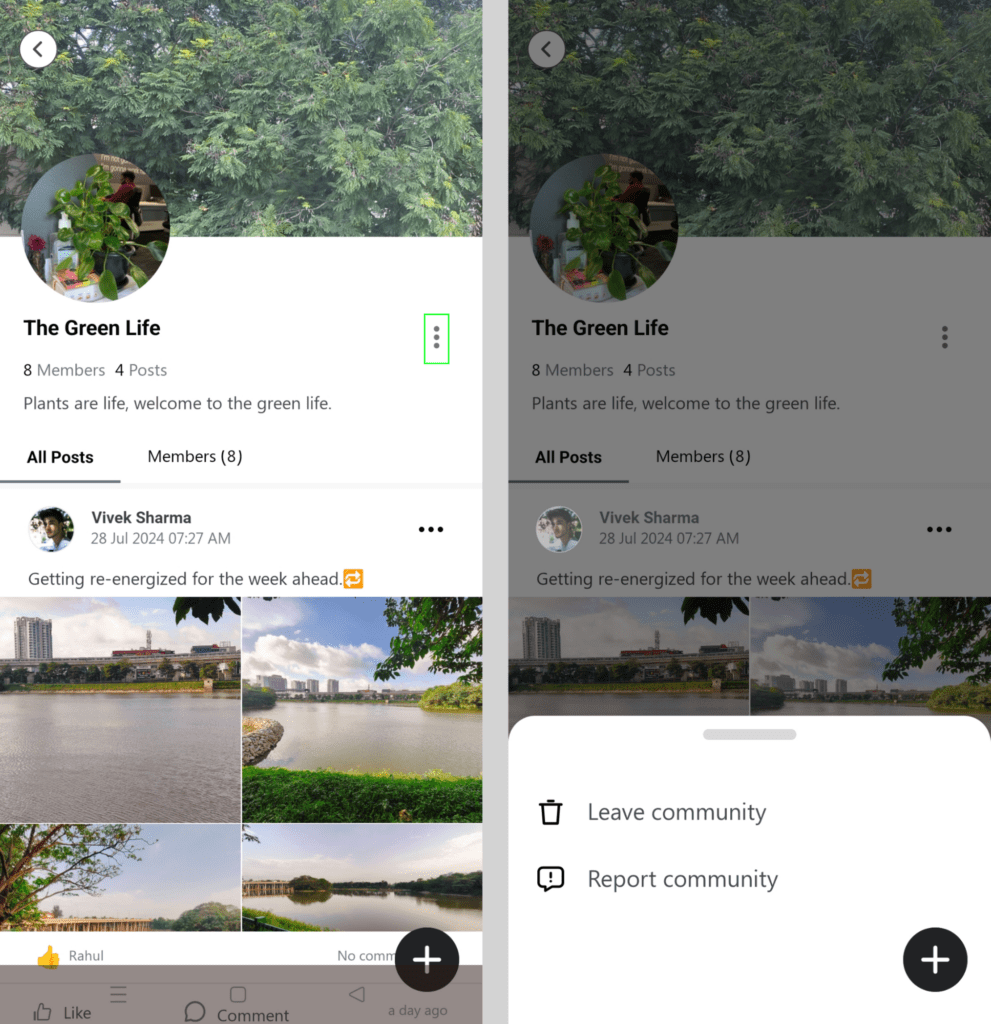
When you land on a particular community page, it will display all the posts and members of that particular community. You can leave a community by clicking the kebab menu (marked in green), and a pop-up will appear and you can click on the button ‘Leave Community’. See the screenshot below.
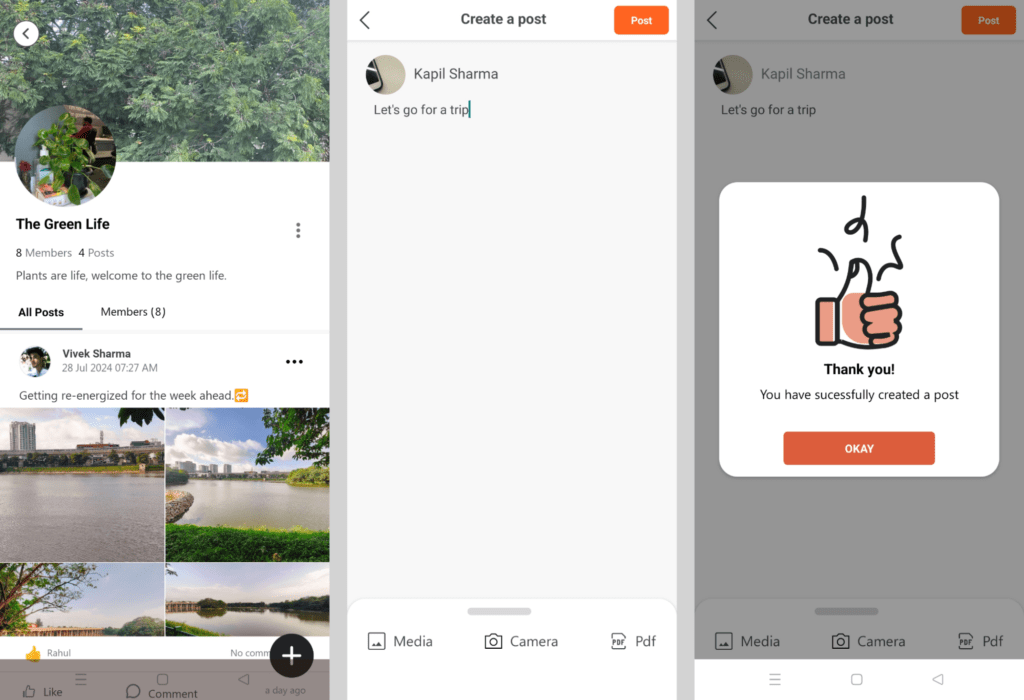
To create a post, click on the ‘+’ button and a page will appear (middle screen). Enter text, add the required images or documents and click the ‘Post’ button given on the top of the screen. You will get a confirmation message that your post has been added.
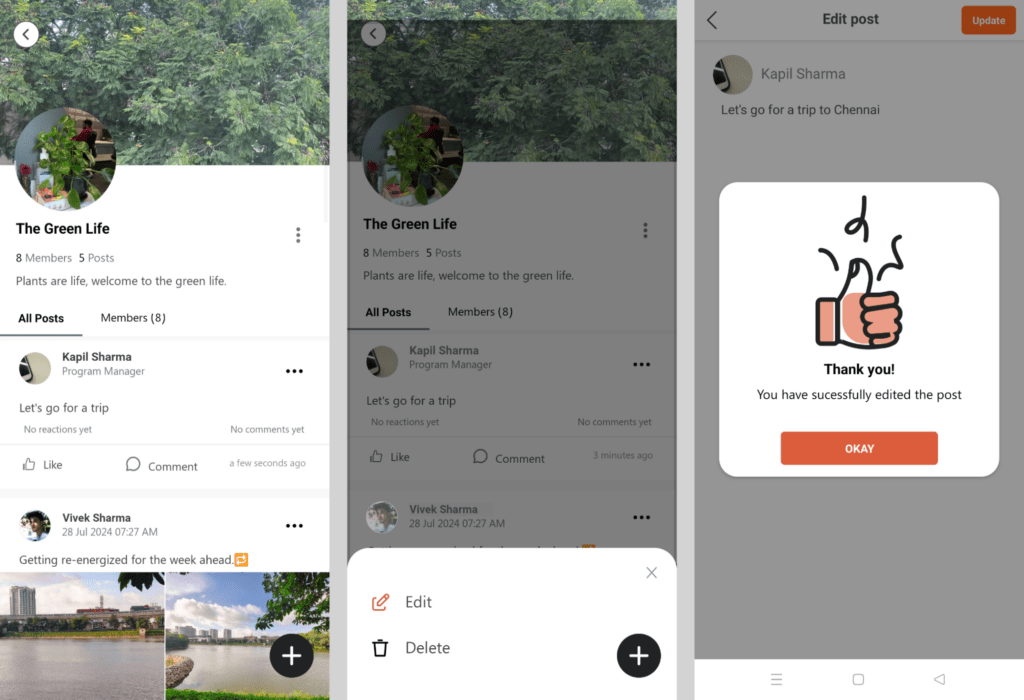
To edit a post, click on the kebab menu next to the name and a pop-up will appear at the bottom of the screen. Click on ‘Edit’ button to edit the post and then click ‘Update’ button given at the top of the screen. You will get a confirmation message that your post has been edited.
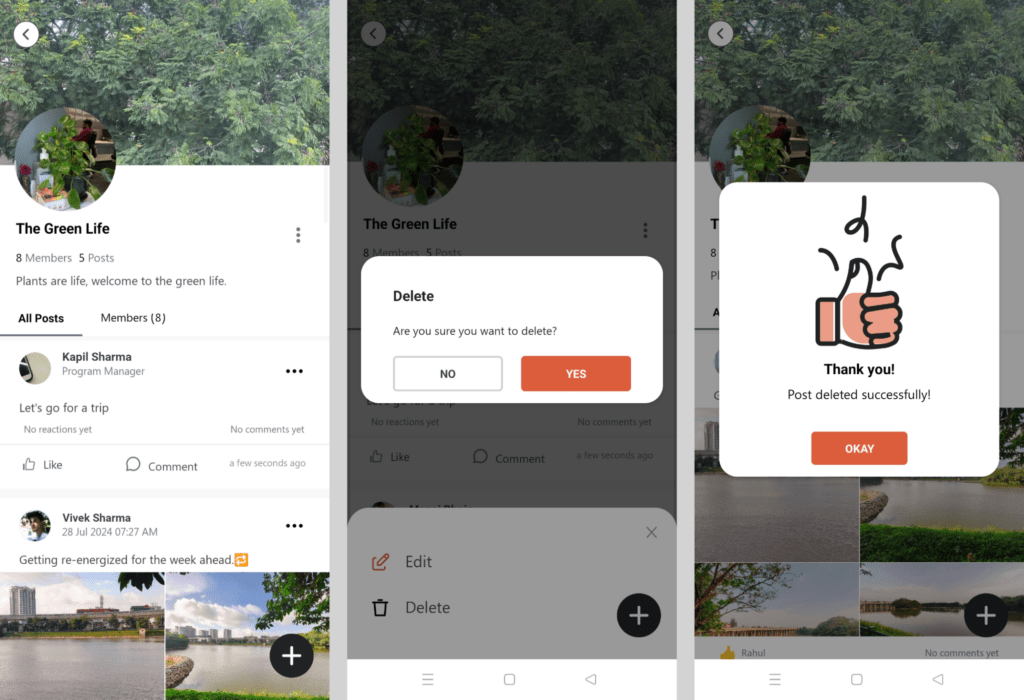
To delete a post, click on the kebab menu next to the name and a pop-up will appear at the bottom of the screen. Click on ‘Delete’ button to delete the post. You will get a confirmation message that your post has been deleted.
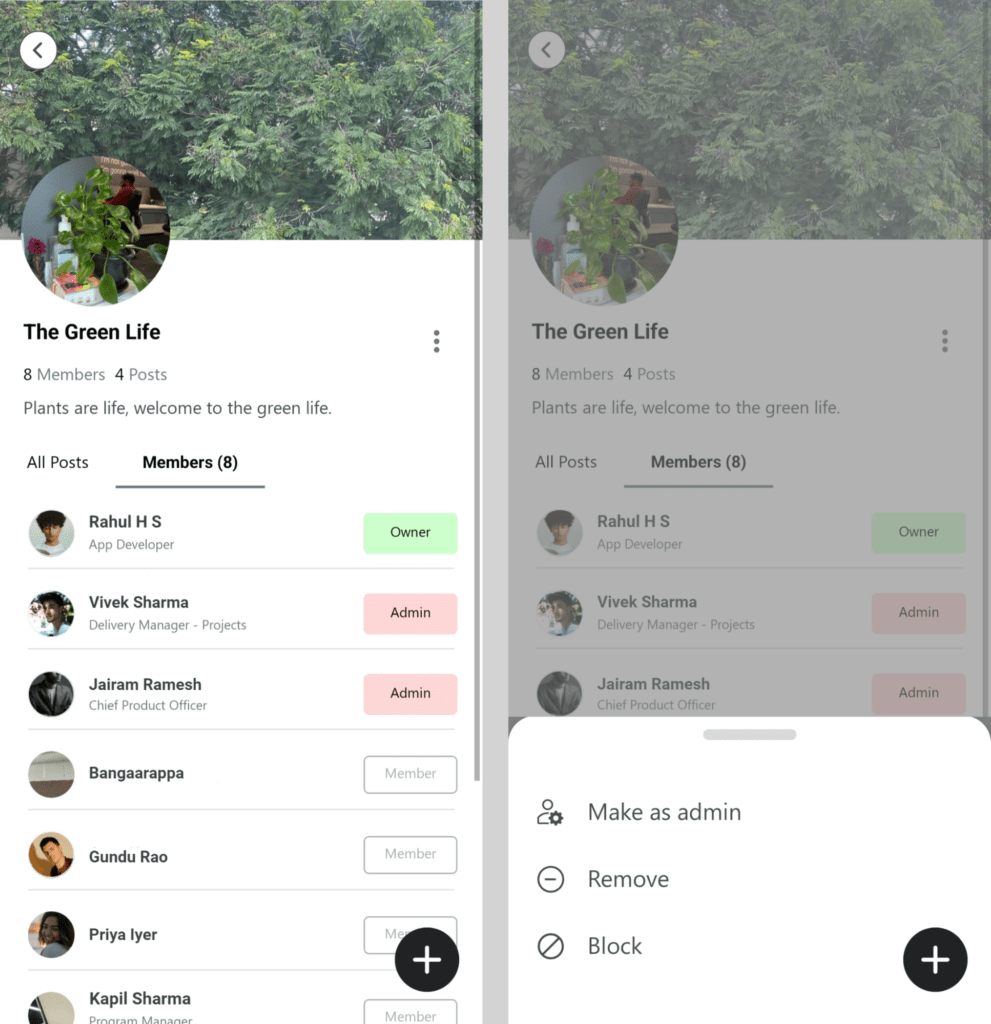
When you click on ‘Members’ tab, you will see the screen as given below. The screen will display the members name and their role in that particular group. You can make a member as an admin, or remove or block by clicking on the ‘Member’ button and a pop-up will appear and you can select the respective option from there.
To create your own community page, click on the ‘+’ button and you will land on the page (2nd screen from the left) where you have to add the cover and profile images, name of the community, a brief description, click on ‘Request to Join’ checkbox, and click on the ‘Add members’ to select the members which will pop-up.
After entering all the information, click on ‘Create’ button (see 3rd screen from left-side).
The ‘My Communities’ tab will show you the groups for which you are member of OR a owner of a group.
Note: ‘Request to Join’ checkbox will help you to receive a request when someone wants to join your community.
