Nhance’s Meeting Room booking system allows reserving the rooms for that particular day or any later date, using our ‘Nhance Twin’ app available on the Play Store and App Store.

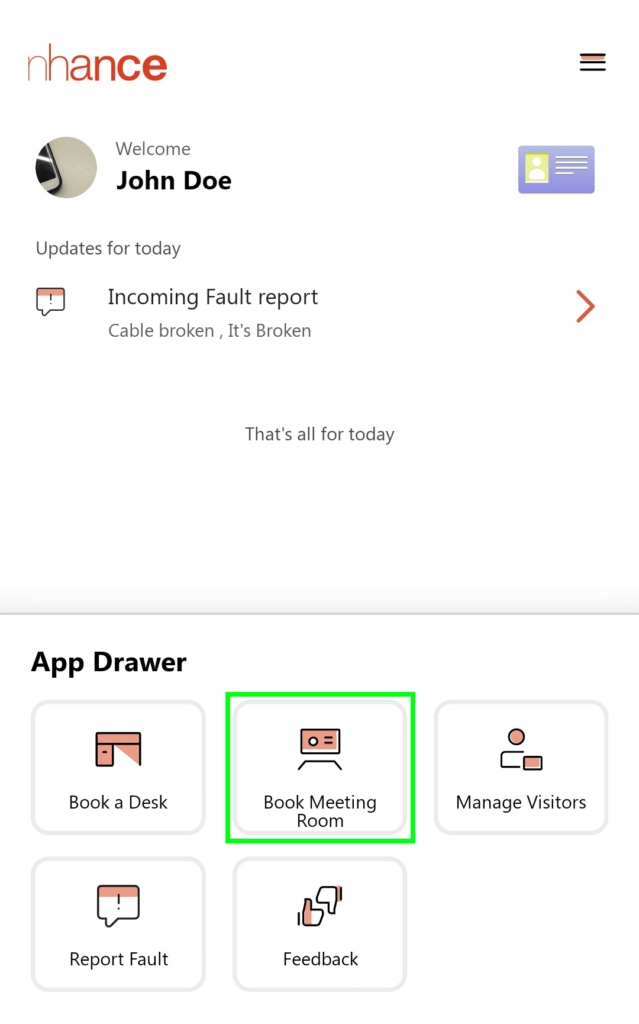
After logging in to the NhanceTwin app, you will land on the home screen. Then you will see the Book Meeting Room button in the Apps section below. (marked in green, in the image below)

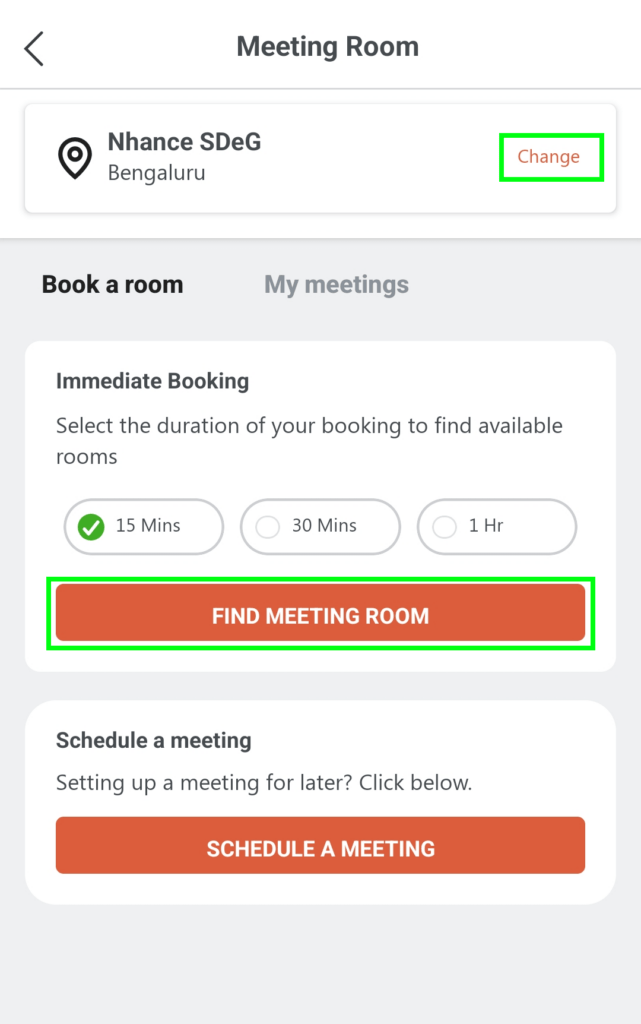
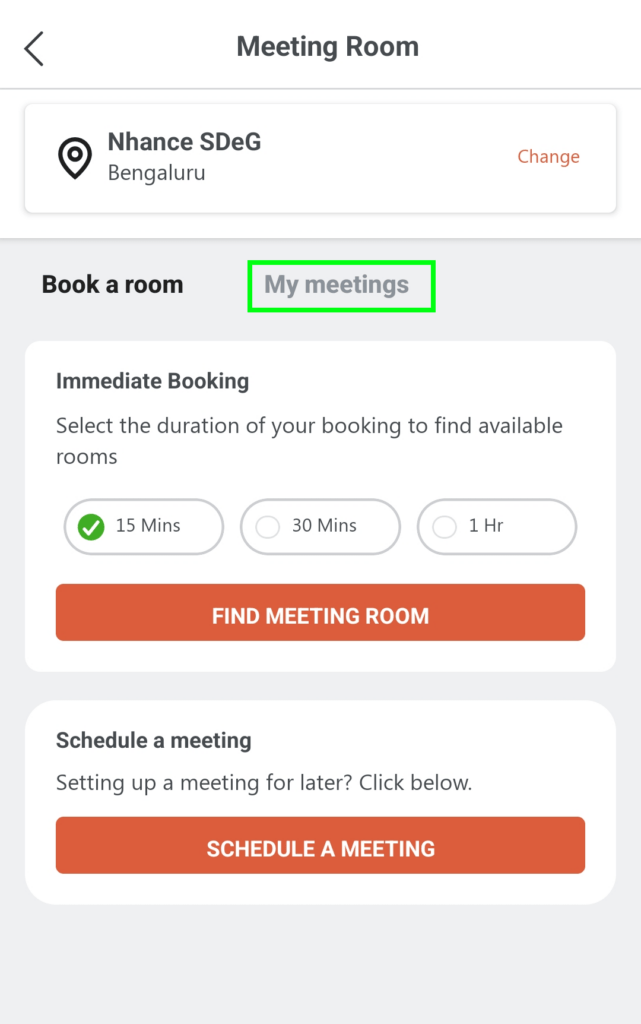
Selecting the ‘Book Meeting Room’ button presents you with the following screen:

Click ‘change’ (marked in green) to choose a different building/branch office from here

Book a room: This tab consists of the two main groups Immediate Booking and Schedule a meeting.

Immediate Booking: This feature allows for facilitating meetings immediately. To book an appointment select any of the 3 given slots and click on the ‘Find meeting room’ button.

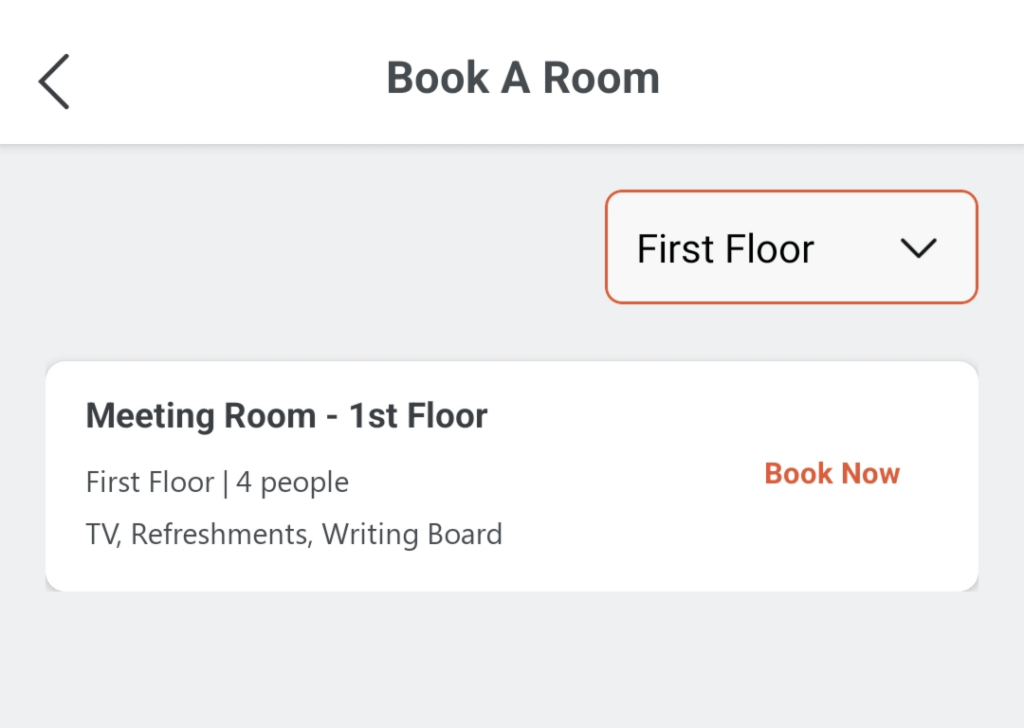
Clicking on the ‘Find meeting room’ button (marked in green, in the above image) presents you with the following screen:

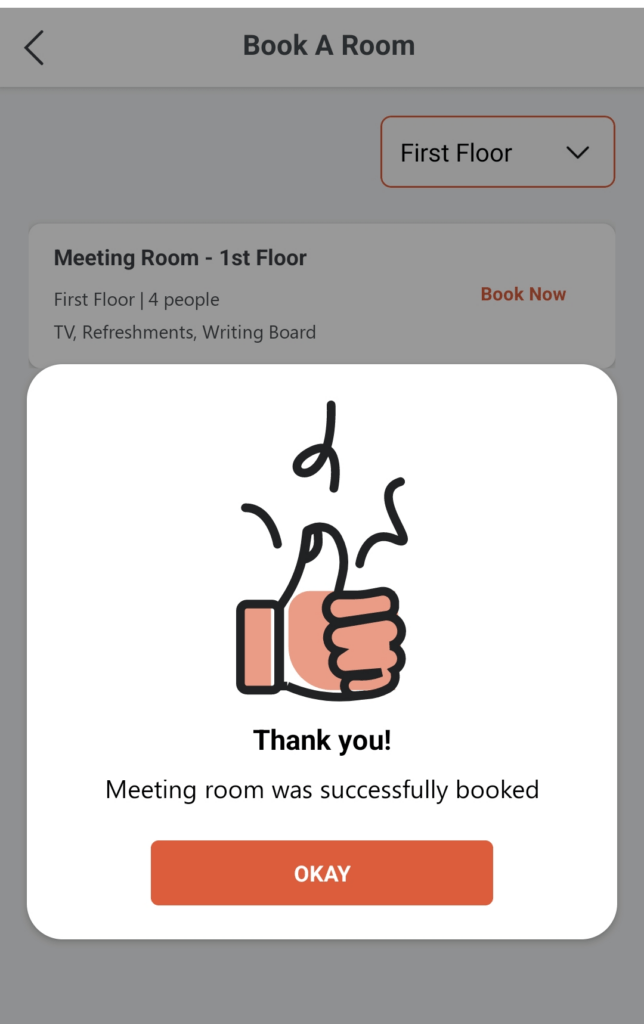
Select the floor number from the given drop-down. Then it will display the available rooms below. Select ‘Book now’ to book that particular room. After a successful booking, a confirmation message will be shown, see the image below.

After clicking the ‘Okay’ button presents you with the following screen:

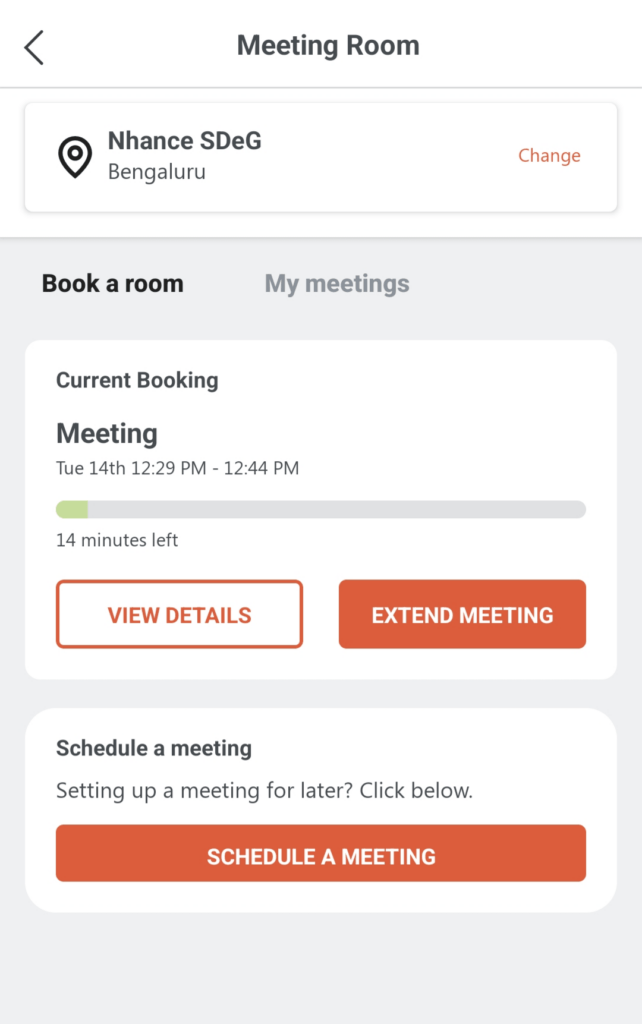
This screen will give capsule information about the meeting day, time, and how much time is left. For more details click on the ‘View Details’ button and it will display the following details as per the screen below.

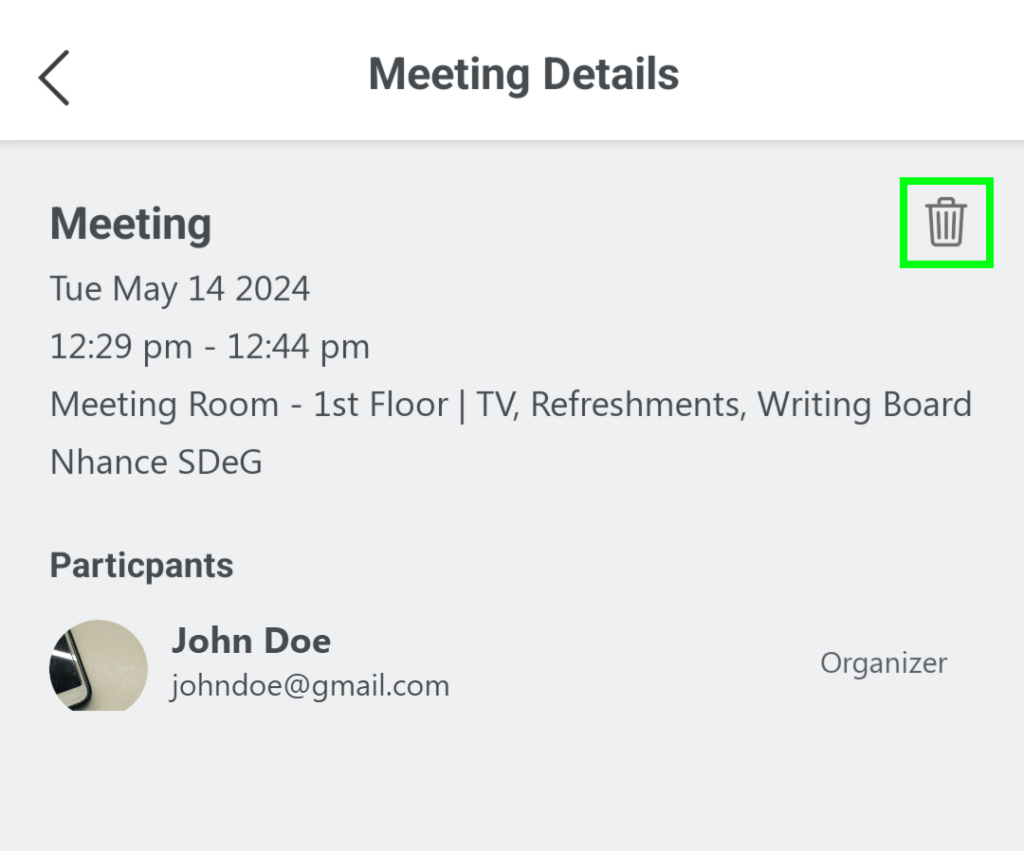
This screen will provide details of the building name, meeting day, time, floor number, room equipment, and available refreshments. Click on the trash icon (marked in green) to delete the booking.

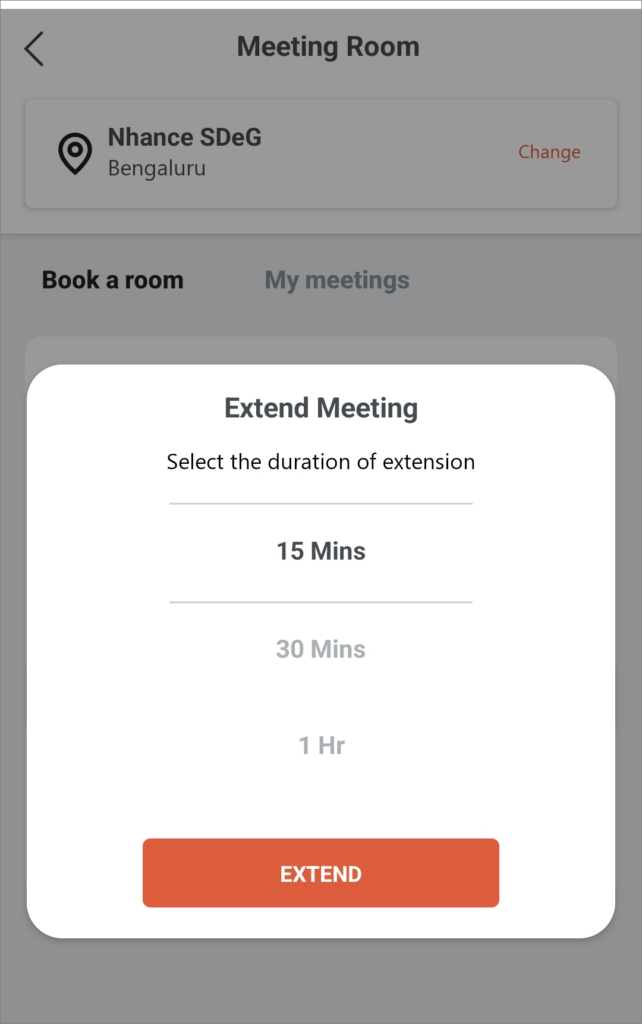
After clicking the ‘Extend Meeting’ button presents you with the following screen:

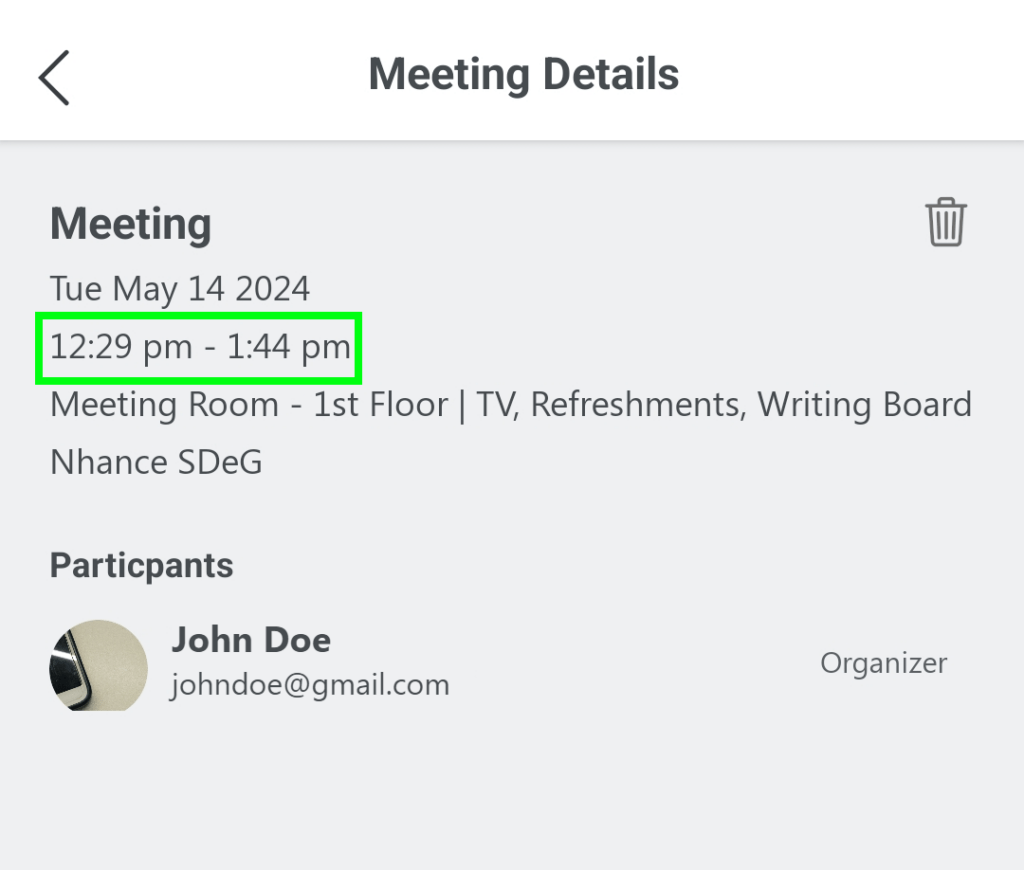
Select the required time to be extended and click on the ‘Extend’ button. After that, it goes to the ‘Meeting room’ screen. Click on ‘View details’ again to get then updated time details (marked in green). See the image below:

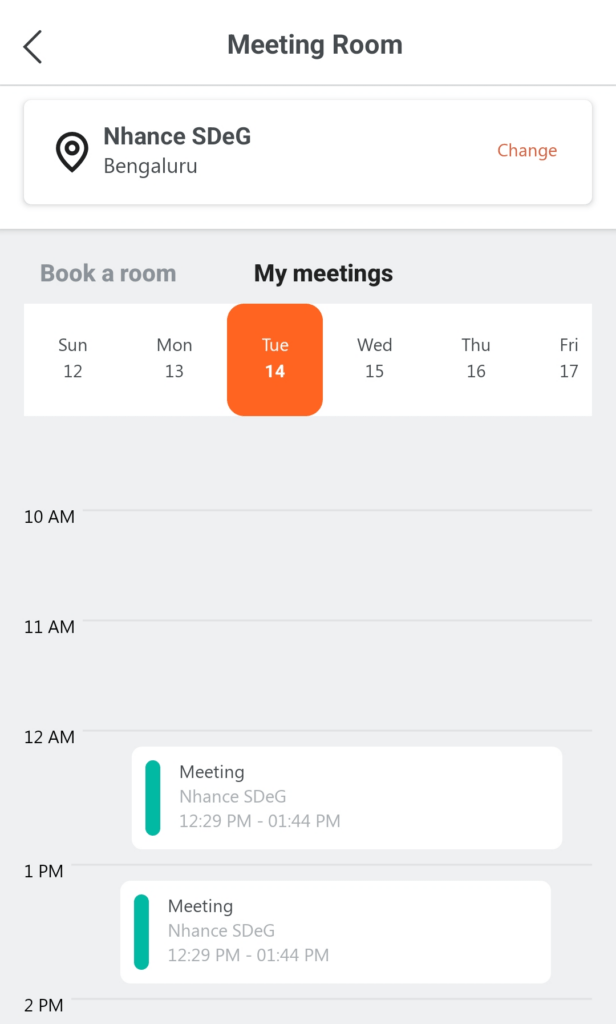
Click on the ‘My Meetings’ tab (marked in green) to view all the scheduled meetings

Clicking on the ‘My Meetings’ tab presents you with the following screen:

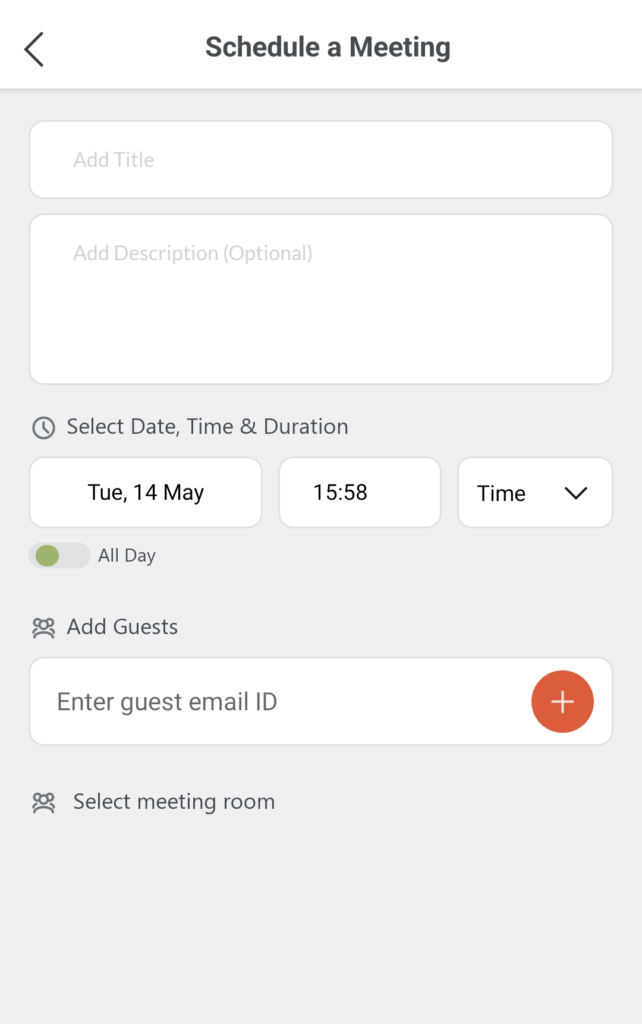
After clicking on the ‘Schedule a meeting’ button will present you with the following screen:

  1. Title: Add the title or the subject of the meeting
  2. Add Description: This is an option field. Any additional data for the meeting is to be added here.
  3. Select the required date, time and duration of the meeting
  4. Enable the slider ‘All day’ to book a meeting for the entire day
  5. Add Guests: Type the guest’s name and click ‘+’ button to add them
  6. Select meeting room: This will present you with the ‘Book a room’ screen where you can select the floor number and a relevant meeting room.
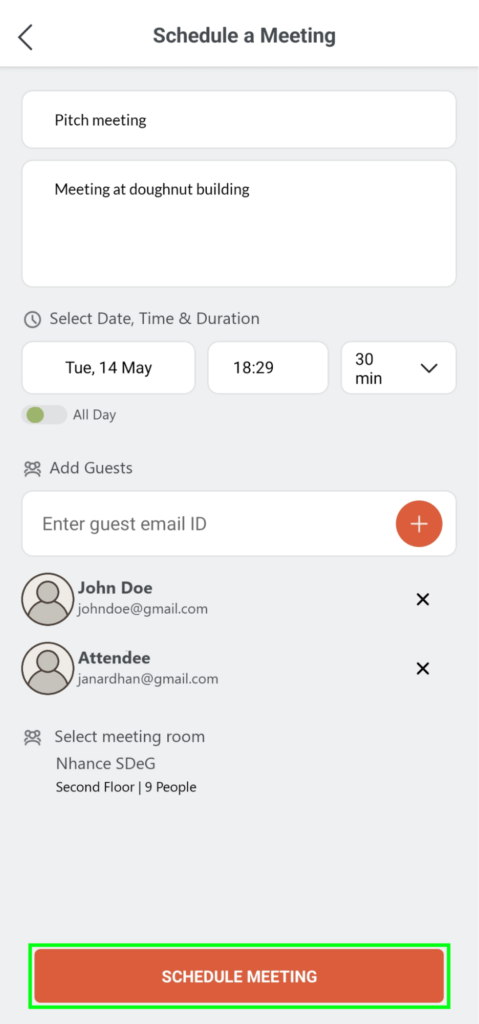
  7. The ‘Schedule meeting’ button will be enabled after you enter all the details. See the screenshot below (marked in green).

After clicking on the ‘Schedule meeting’ button a confirmation screen will appear similar to the ‘immediate booking’.

Note:

  1. You cannot schedule a meeting for a few days at a time
  2. You cannot switch Meeting Rooms at any point in time or day
Visited 46 times, 1 visit(s) today

Comments are closed.

Close Search Window