Visited 73 times, 1 visit(s) today
May 2, 2024• Staff Writer
The Admin Console provides access to various admin-only features such as User Management, managing Departments, Categories, Groups, and Areas, and the attendance of all employees.
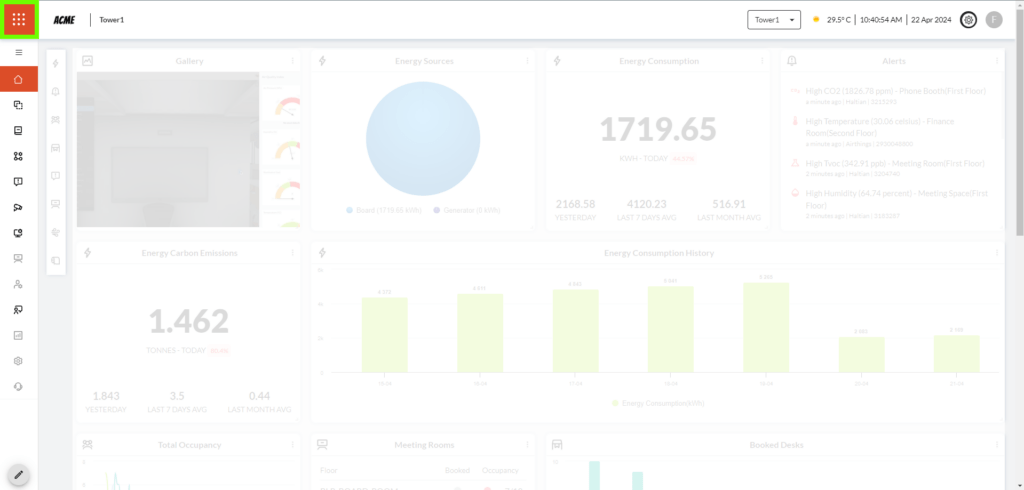
The Admin Console can be accessed by clicking on the navigation button. (marked in green, in the image below)
Clicking on the navigation button opens up a sub-menu that allows flipping between the Admin Console and Digital Twin modes.
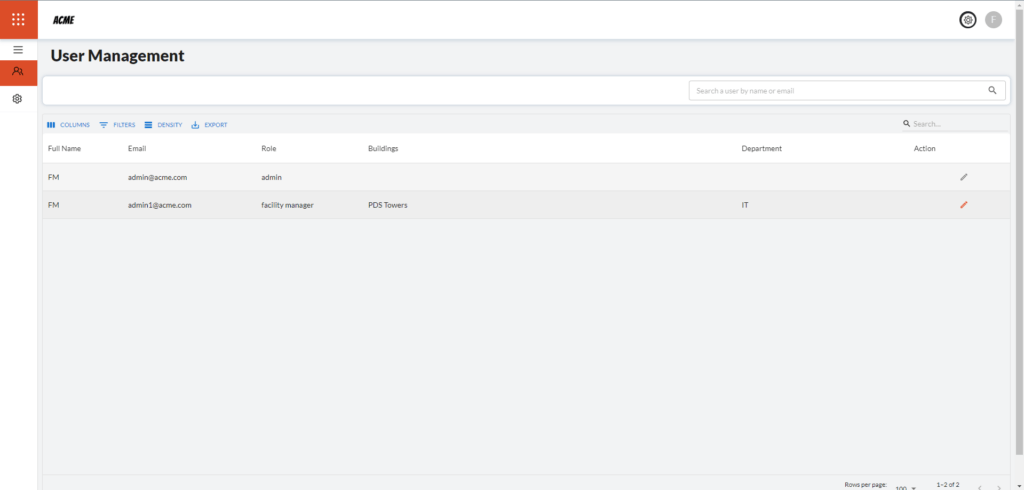
Selecting the Admin Console mode presents you with the following screen:
This screen features User Management that allows adding and editing access to employees to parts of the dashboard.
The displayed data can also be exported by clicking the export button below the search bar to the left.
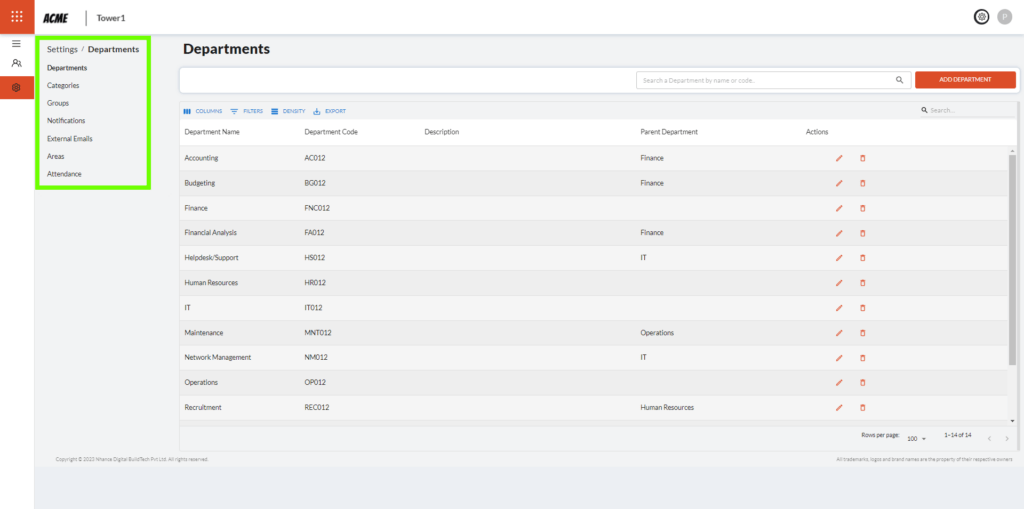
The Admin Console is also home to some admin-only features that provide access to the following settings:
1. Departments – Assets and faults can be assigned to departments ensuring the selected department is notified, via email or SMS, should any fault be raised or an asset’s warranty expires.
1.1 A department can be added by clicking the ‘Add Department’ button, situated to the right of the search bar.
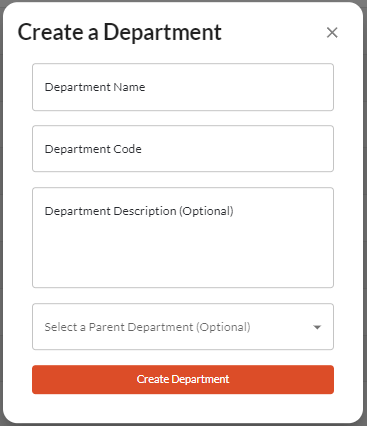
1.2 Clicking on the ‘Add Department’ button presents us with the following screen:
Department Code represents the code by which a department can be tagged and filtered.
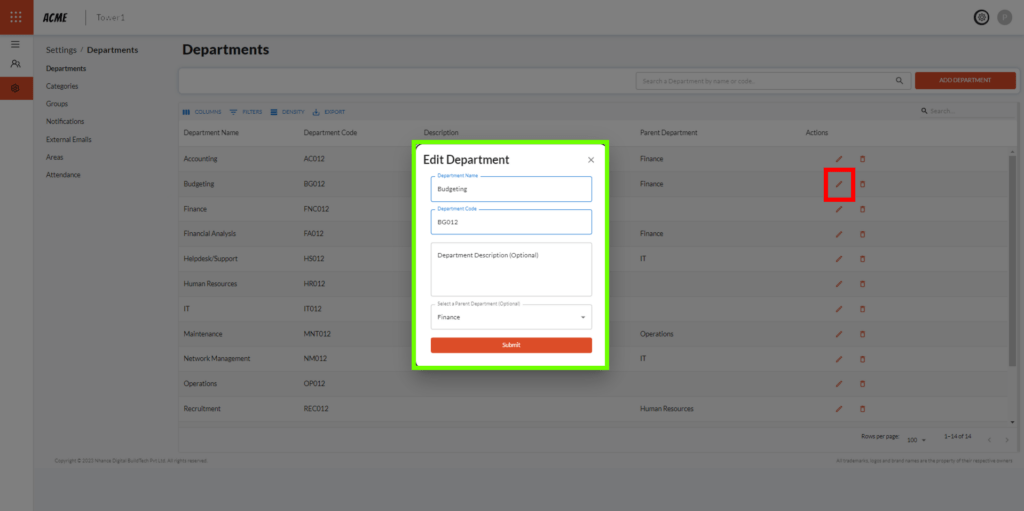
1.3 An existing department can be edited by clicking the pencil icon in the ‘Action’ column (marked in red). Editing a department presents us with a menu similar to Adding a department.
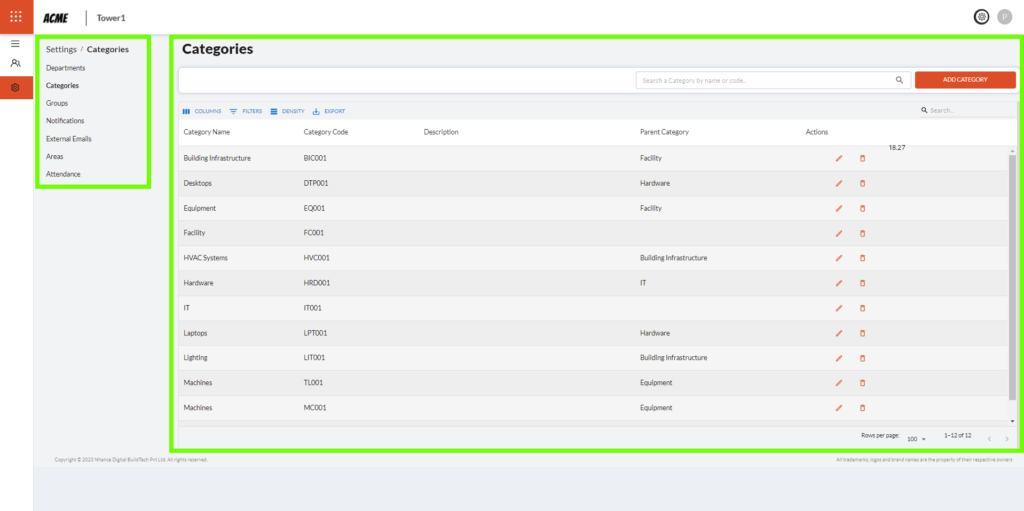
2. Categories – Similar to departments, Categories are used to assign Assets and faults for organizational purposes.
Categories can be accessed by clicking on the Categories sub-menu.
2.1 A category can be added by clicking the ‘Add Category’ button, situated to the right of the search bar.
2.2 Clicking on the ‘Add Category’ button presents us with the following screen:
2.3 Category Code, much like the department code, represents the code by which a category can be tagged and filtered.
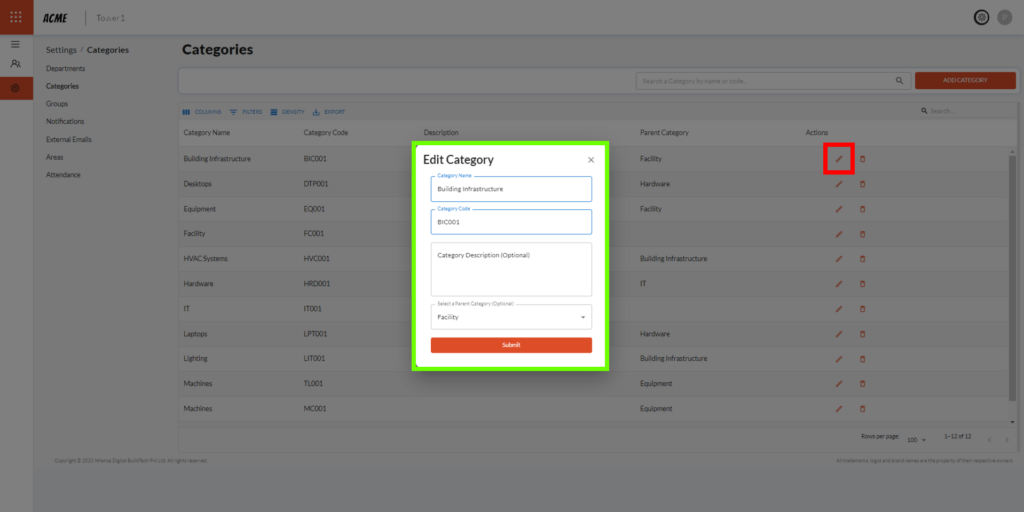
2.4 An existing category can be edited by clicking the pencil icon in the ‘Action’ column (marked in red). Editing a category presents us with a menu similar to Adding a category.
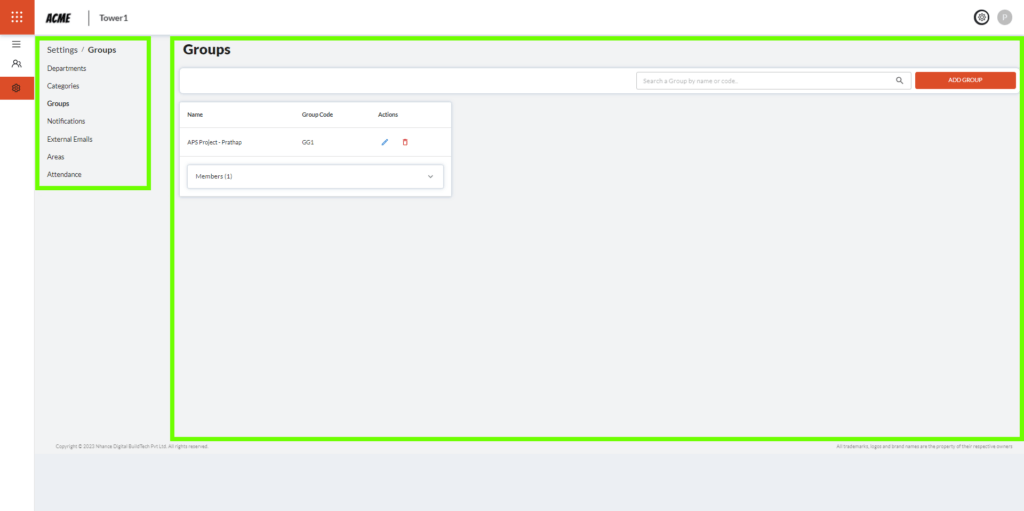
3. Groups – Various members of the company can be added to groups to add Notification Mappings, for services such as Asset Management and Fault Reporting. Members in these groups receive notifications for the subscribed services via either email or SMS.
3.1 A group can be added by clicking the ‘Add Group’ button, situated to the right of the search bar.
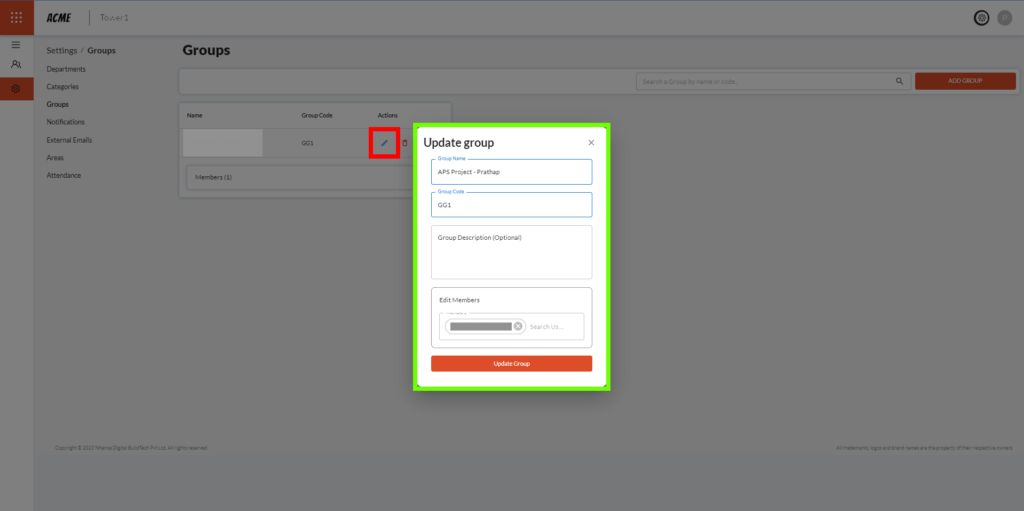
3.2 Clicking on the ‘Add Group’ button presents us with the following screen:
3.3 Group Code, much like the department and category code, represents the code by which a group can be tagged and filtered.
3.4 An existing group can be edited by clicking the pencil icon in the ‘Action’ column (marked in red). Editing a group presents us with a menu similar to Adding a group.
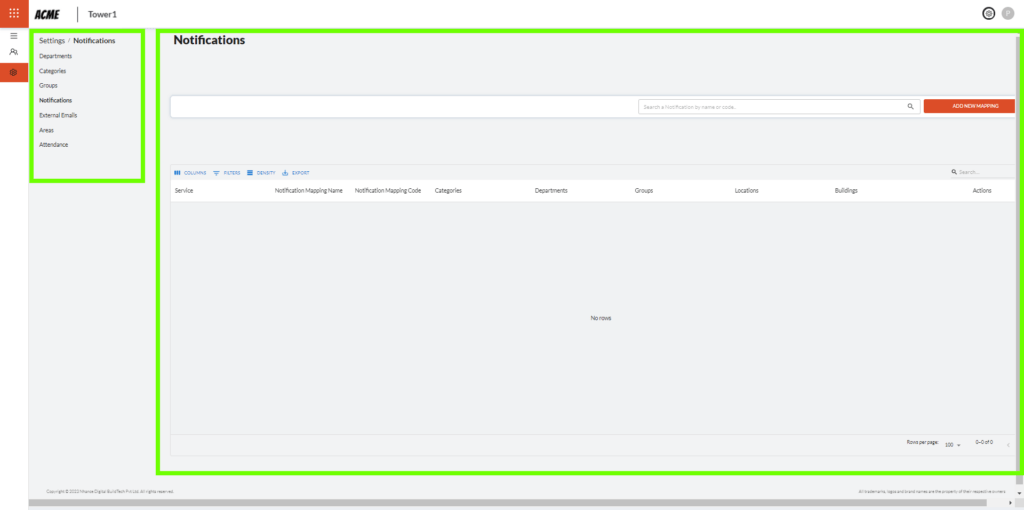
4. Notifications – This section allows you to set up notifications for services such as Asset Management and Fault reporting, for specific groups or departments.
Note: Setting up notifications for certain groups requires additional details such as the location of the building and its ID.
4.1 A notification mapping can be added by clicking the ‘Add New Mapping’ button, situated to the right of the search bar.
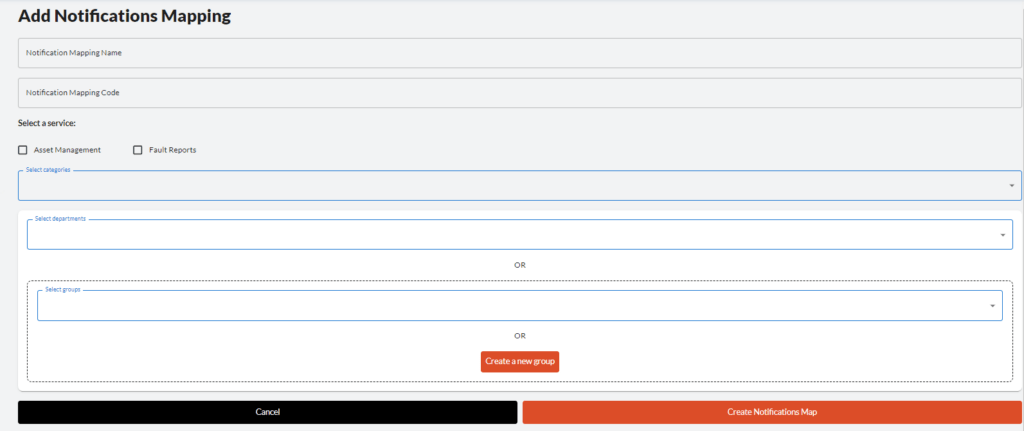
4.2 Clicking on the ‘Add New mapping’ button presents us with the following screen:
4.3 Notification Mapping Code, much like the department and category code, represents the code by which a notification can be filtered.
4.4 Selecting a service determines what service the notifications are about.
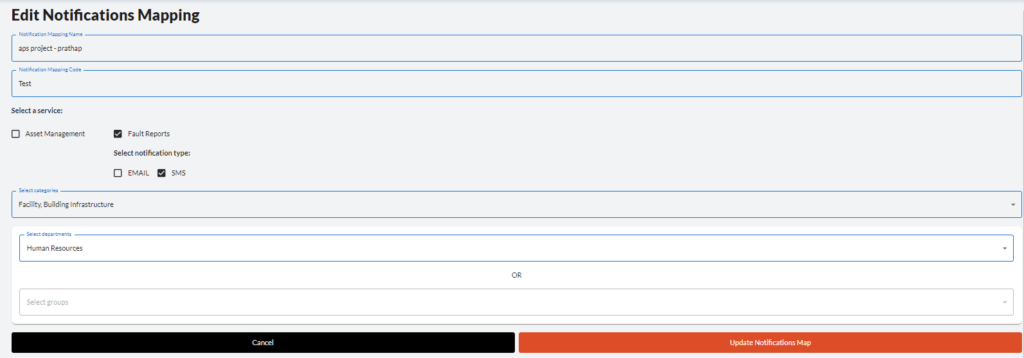
4.5 You can also opt for the medium of the notifications to receive (email or SMS).
4.6 Respective categories, departments, and groups can be selected from the provided dropdowns.
4.7 Notification mappings can be edited by clicking the pencil icon in the actions column, presenting us with a similar interface to that of adding a new notification mapping.
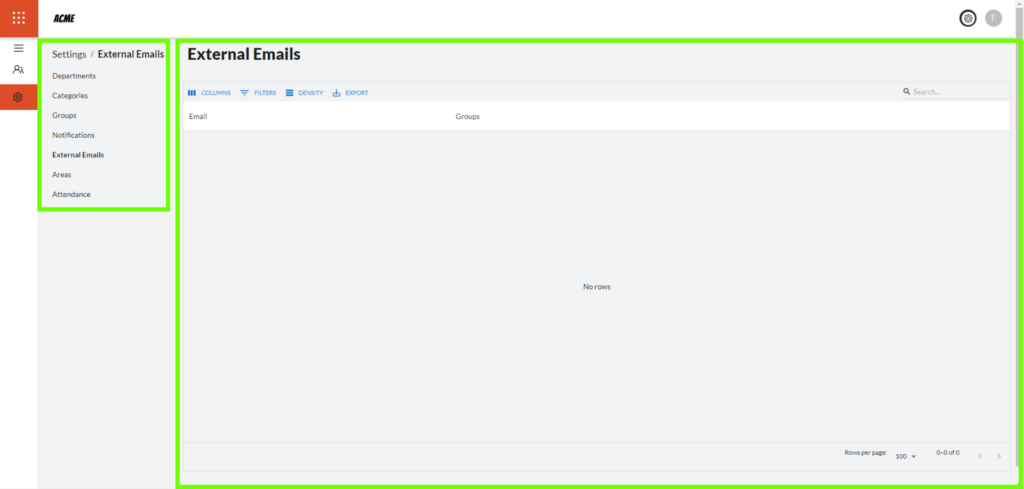
5. External emails – External emails refer to contact information of people outside the organization. This section allows monitoring of external groups and organizations to which the assets and faults are assigned.
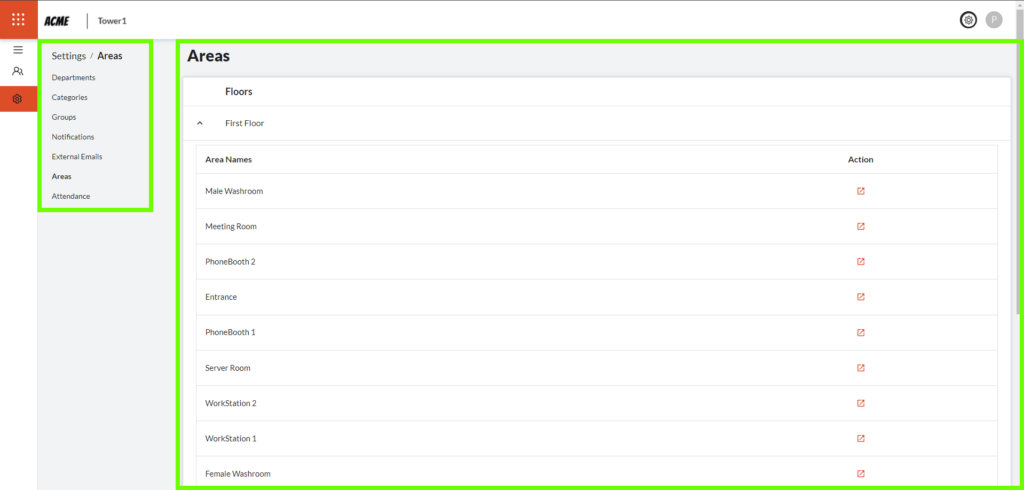
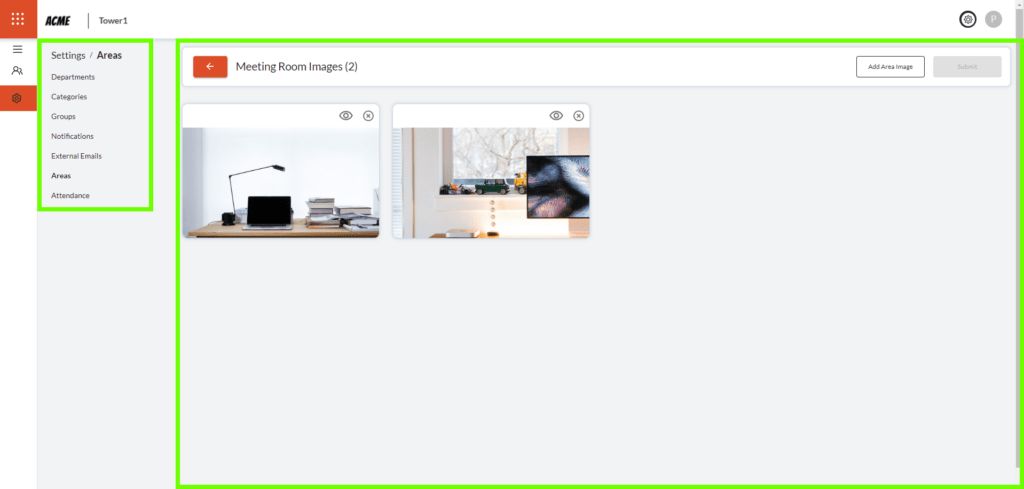
6. Areas – This section allows uploading and viewing images for/of an area.
6.1 An area can be edited by clicking the icon in the ‘Action’ column.
6.2 Clicking the mentioned button leads to the page where images for that area can be modified or uploaded.
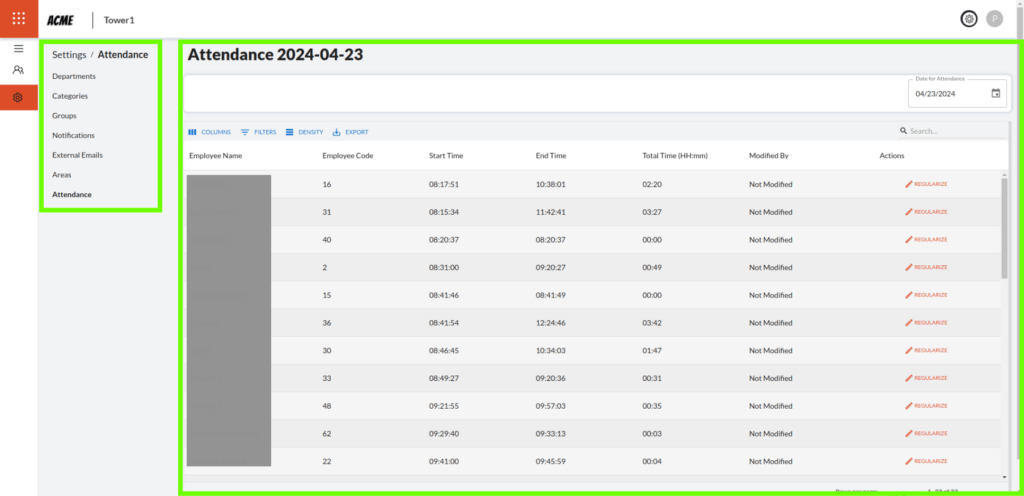
7. Attendance – This screen allows viewing and monitoring the attendance of employees by recording their in and out times. It allows regularizing attendance by raising a request and rectifying incorrect attendance entries.
113, 2nd Cross Rd,
East of NGEF Layout,
Kasturi Nagar, Karnataka,
Bengaluru – 560043