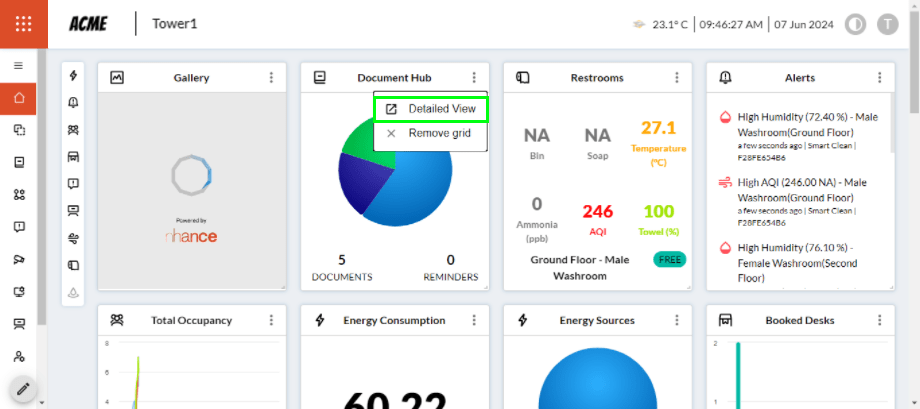
The Document Hub on the dashboard will display the number of documents available and reminders, if any. Also, it shows the folders available in a pie chart. The Document Hub Overview page can be accessed from the dashboard by clicking on the ‘Detailed view’ button (marked in green) of the ‘Document Hub’ card on the dashboard. See the image below.

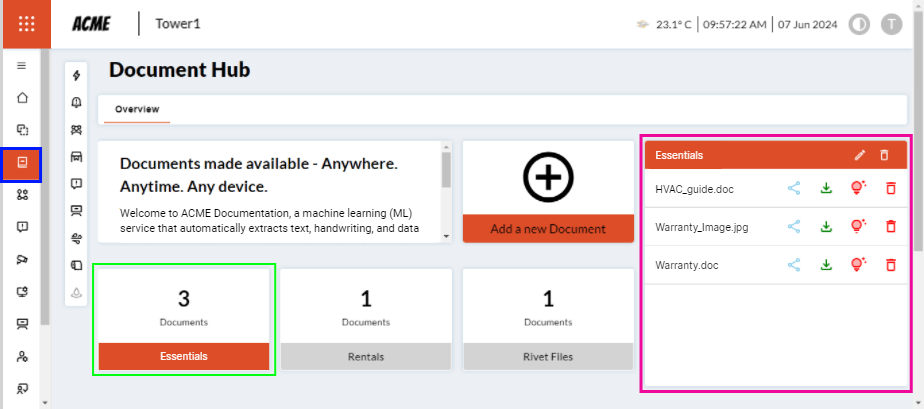
The Document Hub Overview page can also be accessed from the main menu (marked in blue). The Overview page displays the basic introduction of the feature, Existing folders (marked in green) created earlier and the number of documents present, a new document option, and folder content viewer (marked in purple). 

When you click on any existing folders, you can view the files on the right side of the page in the ‘Folder content viewer’. ‘Folder content viewer’ allows you to share, download, view and delete any file. 

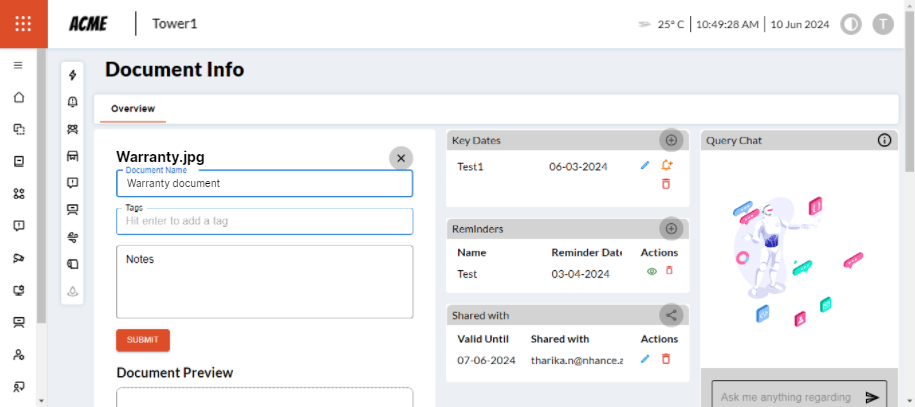
You will be presented with the following screen when you click the bulb icon (Document Info).

The ‘Document Info’ screen will display the following:

  1. Document name: shows the name and file type of the document.
  2. Document preview: displays the preview of any document.
  3. Key dates: Important dates that need attention or any action needs to be taken on that particular date, for example: warranty expiry date etc. You can also edit a date, set reminders for a specific date, and delete whichever date is not required.
  4. Reminders: Create a reminder for any important dates. You can view the details by clicking the eye icon beside the date. There is an edit option (pencil icon) given in the viewing window. Also, you can delete the date which is not required.
  5. Shared with: You can share a document with anyone until a specific date. After that, the document will not be accessible to that person.
  6. Query Chat: It is a bot which helps you in searching for specific information within a particular document.

You will be presented with the following screen when you click on the pencil icon to edit the document

  1. Document Name: change the name as required.
  2. Tags: You can add multiple tags for a document.
  3. Note: Add important/relevant notes here.
  4. Submit: Click the button to submit the changes.

When you click on the ‘Add a new Document’ button, you will be presented with the following screen:

To create a new category, type the relevant text in the field next to the ‘Add Category’ button and click on the ‘Add Category’ button. OR select from the dropdown list for the existing category. Click the ‘Upload document’ button to upload the required document. Add tags and notes needed for a document and click ‘Submit’ to upload the document.

Visited 34 times, 1 visit(s) today

Comments are closed.

Close Search Window