Visited 30 times, 1 visit(s) today
July 2, 2024• Staff Writer
Asset Manager refers to allocating information on all the assets in both workspaces and held by the employees in an office. It is useful for tracking and maintaining assets.
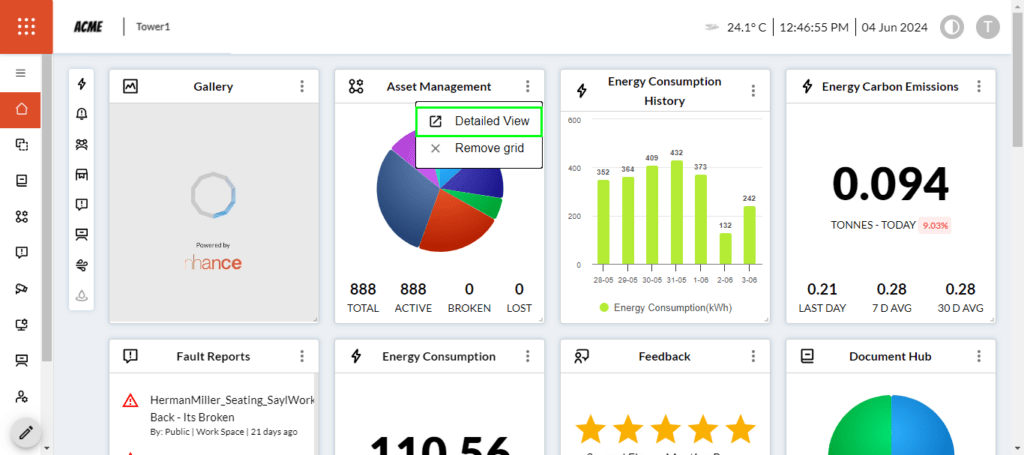
Asset Manager can be accessed from the dashboard by clicking on the ‘Detailed View’ (marked in green) of the ‘Asset Management’ card on the dashboard. See the image below.
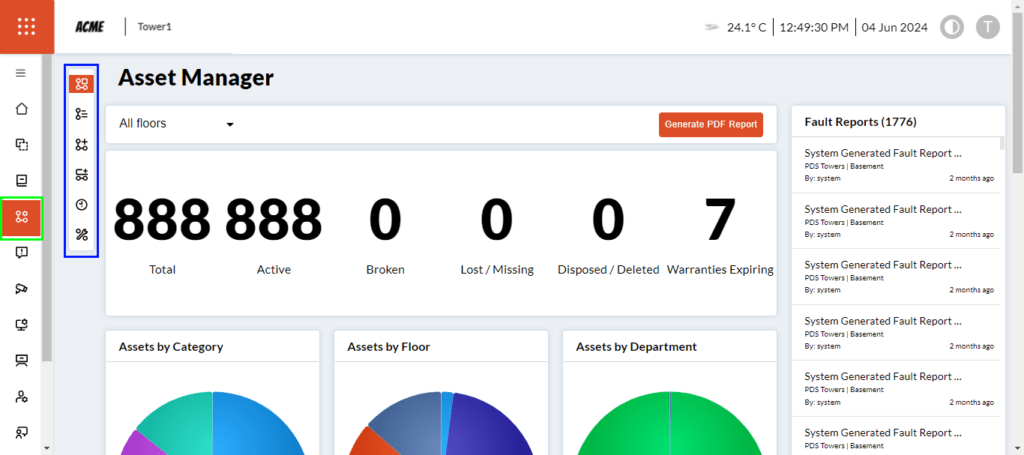
To access the Asset Manager, click on the icon (marked in green) in the main menu on the dashboard. The Asset Manager has a sub-menu (marked in blue), which includes an Assets List, the ability to add assets using a form or a ready Excel template, to view assets and expiring warranty details, and the option to identify assets that need maintenance.
The beginning of the dashboard area will showcase the following information:
Click on ‘Active’ to land on the Assets List page or click on the second button in the sub-menu.
Note: The asset list will be shown for that particular building only. If you have multiple buildings/branches, you must select that particular building and see the data.
Below are the graphs which show the Assets by Category, Assets by Floor, and Assets by Department. Hover over each of the graphs to see the relevant information.
Fault Reports: Shows the fault reports, the floor they originated from, and the timeframe.
Below is the information which shows the Assets which require maintenance, leases, leases which will expire, the average age of the asset, and assets under warranty.
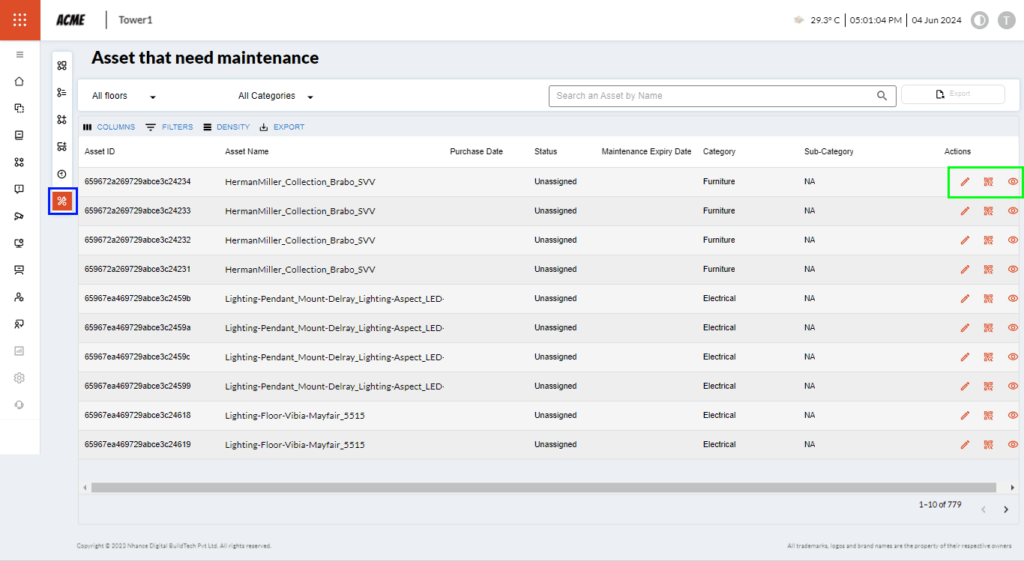
Maintainance Due (Asset that needs maintenance): The card in the dashboard displays the status of the asset, the asset’s name and due date. To view the entire asset list click on the button (marked in blue). Also, a particular asset’s status can be edited by clicking on the pencil icon (marked in green) to open a pop-up (see image with the dropdown on the right side) and then selecting the option from the dropdown to change the status. To open the asset click on the eye icon (marked in green).
Asset that needs maintenance (Maintainance Due) detailed view can be accessed by clicking on the button (marked in blue) from the sub-menu.
The detailed view depicts the following information:
Note: When you scan the barcode from your phone to report the fault, it will show very basic information about the asset, but if you use the NhanceTwin app to scan the barcode the entire data of the asset (laptop image on the right side) will be displayed.
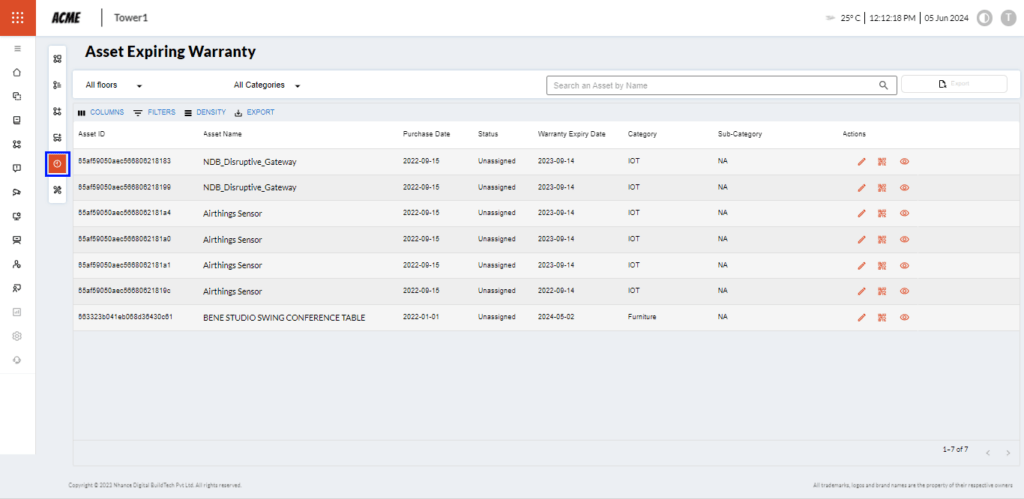
Expiring Warranty: The card in the dashboard displays the asset’s expiry status, name, and due date. To view the entire asset list click on the button (marked in blue). Also, a particular asset’s status can be edited by clicking on the pencil icon (marked in green) to open a pop-up (see image with the dropdown on the right side) and then selecting the option from the dropdown to change the status. To open the asset click on the eye icon (marked in green).
The detailed view of the Asset Expiring Warranty can be accessed by clicking on the button (marked in blue) from the sub-menu. The detailed view depicts information similar to the ‘Asset that needs maintenance’ screen.
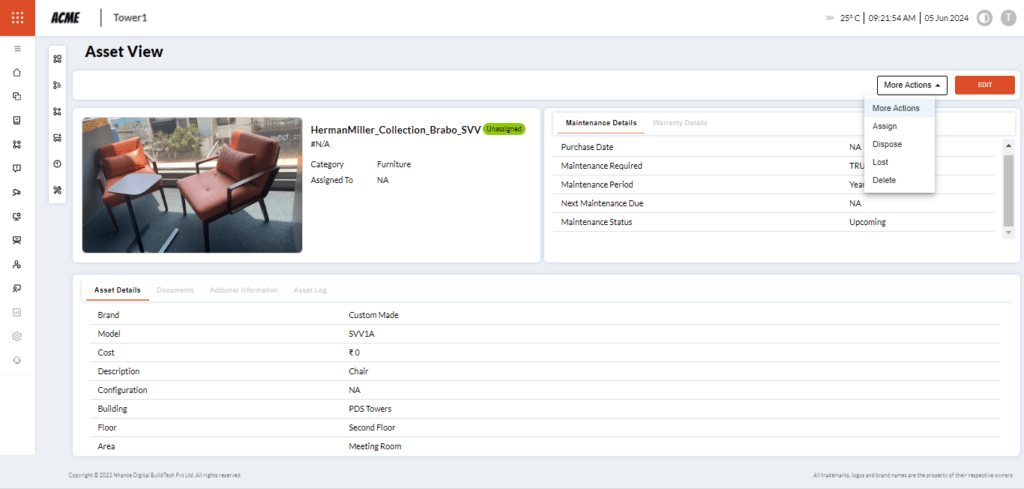
Edit an existing asset: After clicking on the view button of an existing asset from the card or in the assets list, the following screen will appear.
The screen contains the following information about the asset:
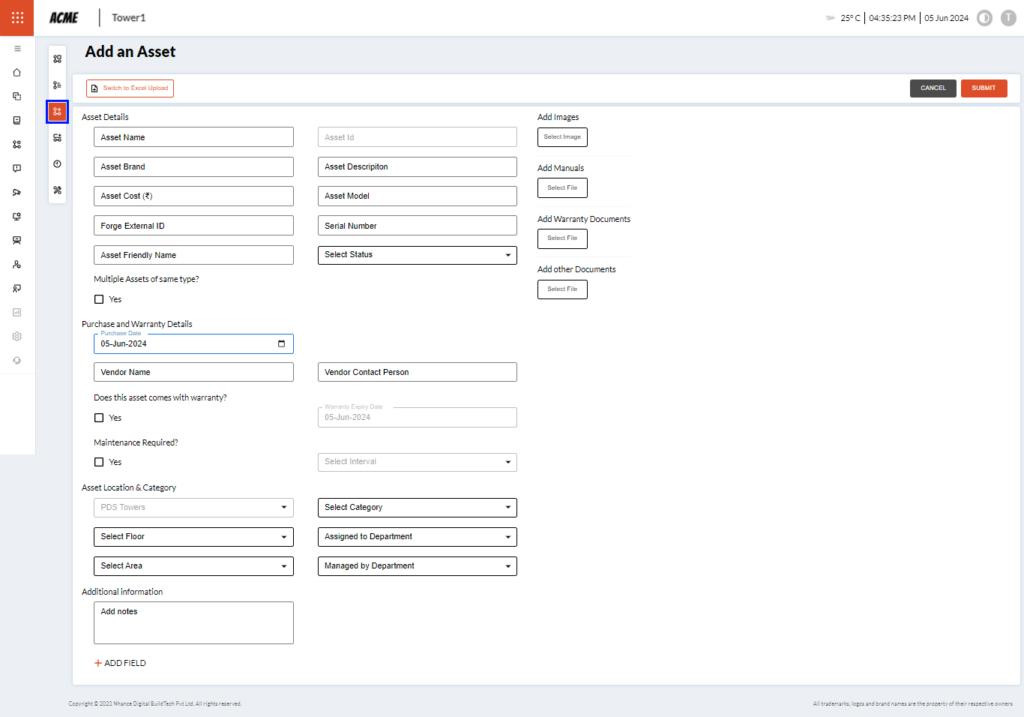
Add an asset: After clicking on the button given in the sub-menu (marked in blue) the following screen will be displayed. Add the relevant information in the fields and click on the ‘Submit’ button. Also, you can upload the details by using an Excel file by clicking on the button ‘Switch to Excel Upload’.
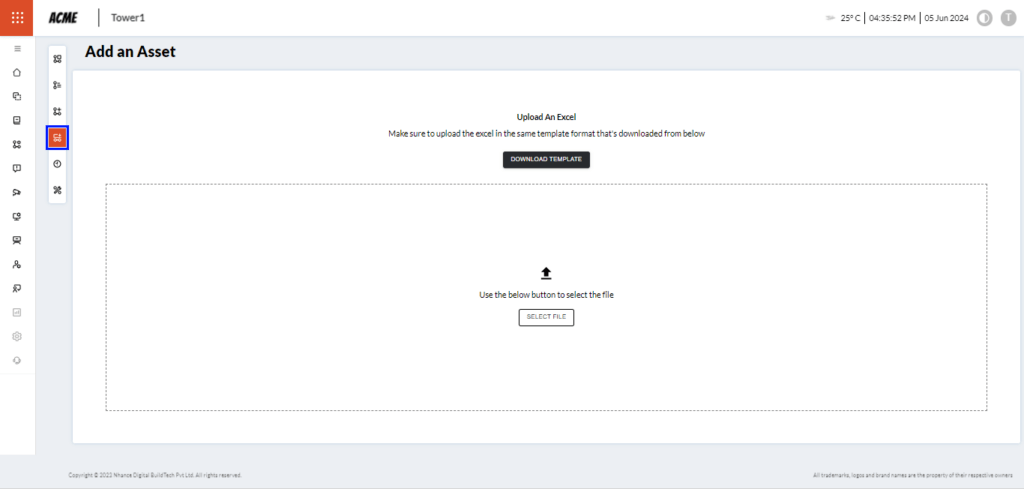
Ad an asset by using an Excel file template: After clicking on the button given in the sub-menu (marked in blue) the following screen will be displayed. Add the relevant information in the fields and click on the ‘Submit’ button. Also, you can upload the details by using an Excel file by clicking on the button ‘Switch to Excel Upload’.
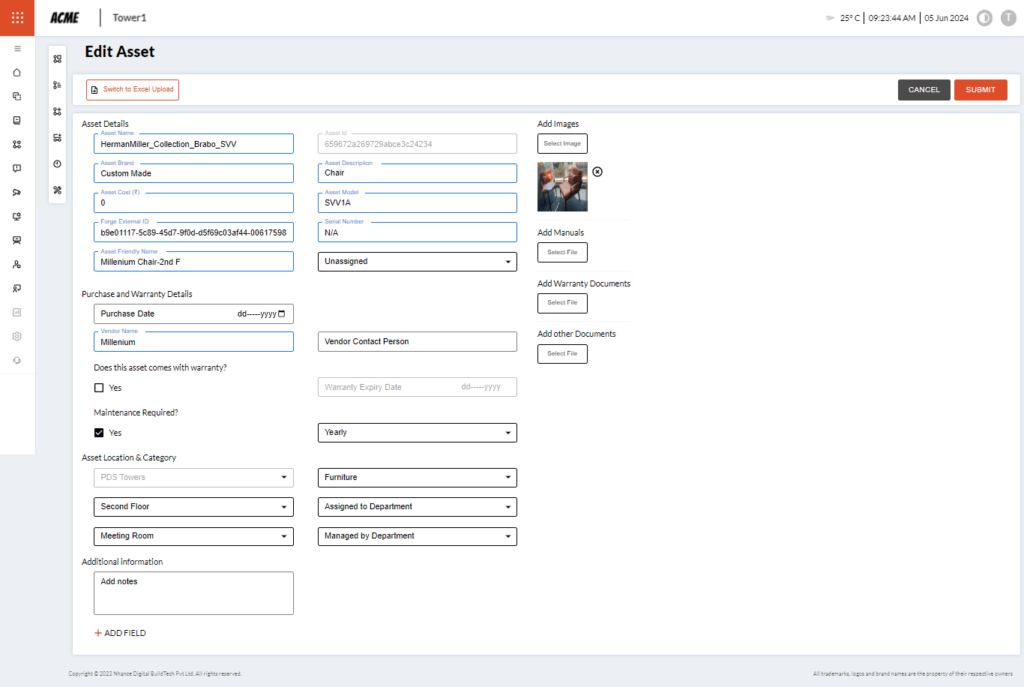
Clicking on the pencil icon of any asset will redirect you to the ‘Edit Asset’ page. See the image below.
113, 2nd Cross Rd,
East of NGEF Layout,
Kasturi Nagar, Karnataka,
Bengaluru – 560043