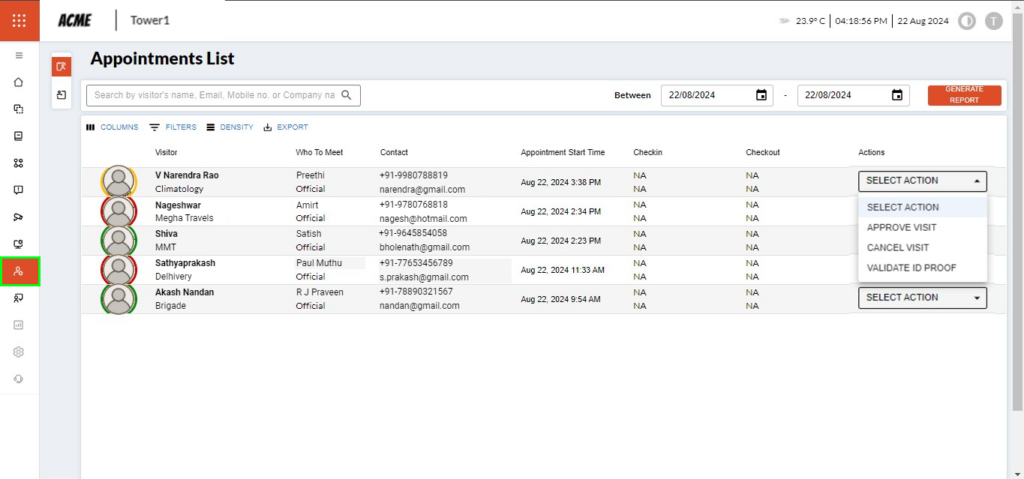
A Facility Manager or an Admin can access ‘Visitor Management‘ from the dashboard. It can be accessed by clicking on the ‘Visitor Management’  button (marked in green). See the image below.

After clicking the ‘Visitor Management’ button, you will land on the ‘Appointments List’ (see the highlighted icon in the sub-menu) page. This page will provide you with the following details:

1. Visitor: Displays the picture of the person, Name, and Company which they represent
2. Who to meet: Displays the person who is supposed to meet the visitor and also the purpose of the meeting. For example: Official, Delivery by any courier.
3. Contact: Displays the visitor’s phone number and email address
4. Appointment Start Time: Displays the date and time of the appointment.
5. Checkin and Checkout: Displays the time, date and place of the entry and exit
6. Actions: The dropdown has 3 options –

a.  Approve Visit: Allows the administrator or facility manager to approve the visit request
b.  Cancel Visit: Allows the administrator or facility manager to cancel the visit request
c.  Validate ID Proof: When clicking on this option the pop-up will appear displaying the details of the ID proof provided by the visitor during the time of entry. Also, gives you an option to approve or deny the document of proof.

7. Date range: Displays the information between two particular dates
8. You can generate reports for a particular date range or a particular day

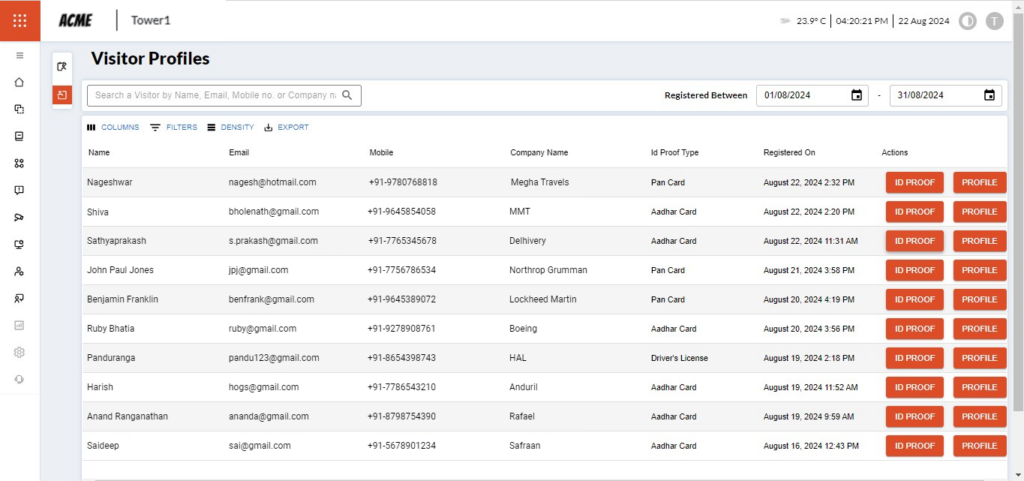
Visitor Profiles

After clicking the ‘Visitors’ button from the sub-menu. This page will provide you with the following details:

1. Displays the Name, Mail ID, Phone number, Company Name, ID Proof Type, date of visit, ID proof and Profile buttons.
2. Search allows you to find the visitor easily
3. Date range: Displays visitor details in the specified date range.

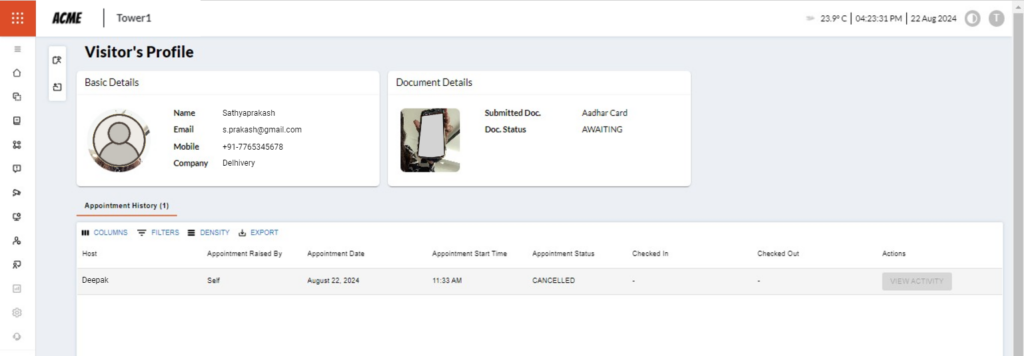
Visitor Profile–detailed information

Clicking on the ‘Profile’ button presents the ‘Visitor’s Profile’ screen (see image above), which displays the visitor’s details such as the host’s name, appointment date, appointment time and status, and the ID proof details submitted before meeting the host. It also displays the host’s name, appointment date, appointment time and status of the appointment.

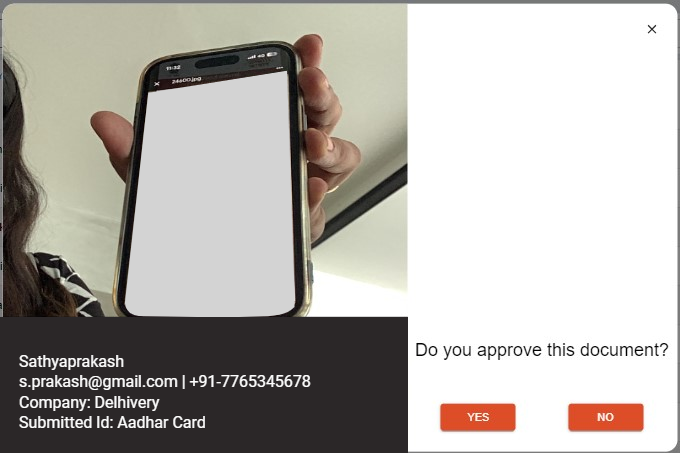
ID Proof–detailed information

When you click on the ‘ID Proof’ button on the ‘Visitor’s Profile’ screen, a pop-up window will open and show the details of the visitor, the ID proof that they showed before the meeting. Also, it gives the admin the option to approve or reject the document.

Visited 43 times, 1 visit(s) today

Comments are closed.

Close Search Window