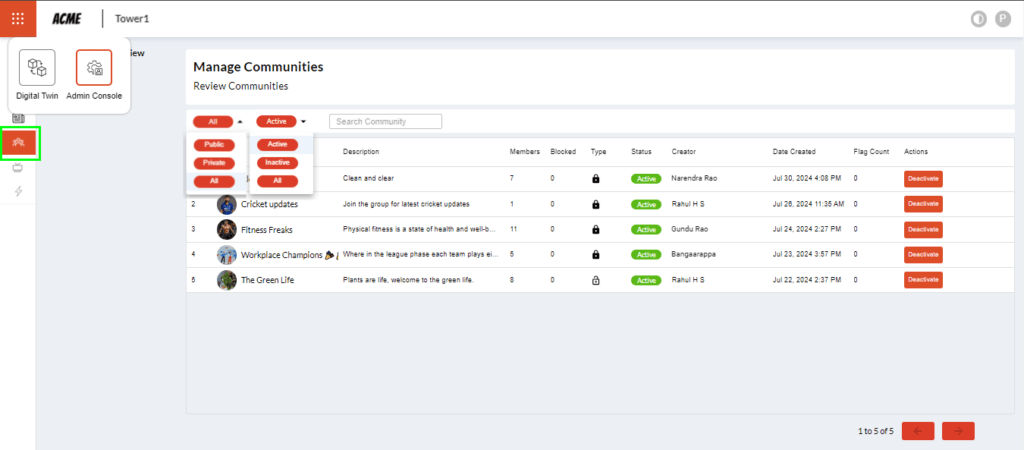
‘Communities’ microservice can be accessed from the dashboard by the facility manager or the admin. It can be accessed by clicking on the ‘Admin Console’ and clicking on the ‘Communities’ button (marked in green). The ‘Admin Console’ can be accessed by clicking on the 9 dots next to the tenant logo. See the image below.

You will land on the ‘Manage Communities’ page after clicking the ‘Communities’ button (marked in green). This page will provide you with the following details:
1. First dropdown: Provides 3 options ‘All’, ‘Public’ and ‘Private’. ‘All’ displays both private and public community groups, ‘Public’ displays public community groups, ‘Private’ displays private community groups. An open padlock icon denotes a ‘Public’ community group. A ‘Private’ community group is denoted by a closed padlock icon (black in the ‘Type’ section).
2. Second dropdown: Provides 3 options ‘Active’, ‘Inactive’ and ‘All’. ‘All’ displays both active and inactive groups. Similarly, ‘Active’ and ‘Inactive’ do their respective roles.
3. Search functionality has been provided.
4. The table below the dropdowns provides you with the following information: Name of the group, Description of the group, Total number of members of a particular group, Type refers to Public or Private group, Status refers to ‘Active’ or ‘Inactive’, Creator refers to the name of the person who created that particular group, Date of creation, and Actions which refers to Activating or Deactivating a group.
5. Flag count: If anybody reports a community or a post it will show as in number here. For example: if 4 people had reported a community or post it will show as 4 in the flag count column.
Note: Flag count will not show in the app.
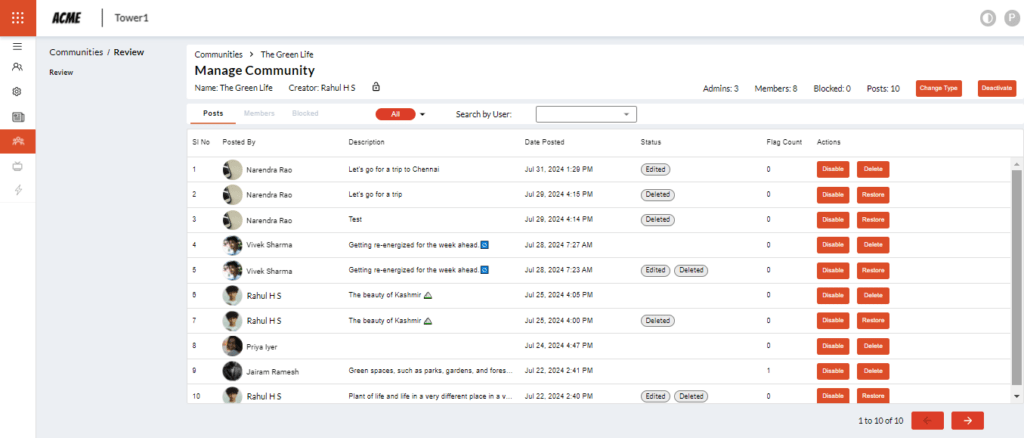
When you click on a particular group you will be presented with the following screen.

The page contains the following:
1. Displays the names of the group and its creator.
2. Displays whether the group is public or private by showing the open or closed padlock icon next to the ‘Creator’ name.
3. Displays the number of administrators, members, number of people who are blocked, number of posts
4. ‘Change Type’ button: This button will change the status of the group from a private to a public group and vice versa.
5. ‘Deactivate’ button: By clicking on this button the group will be deactivated. Also, the button changes the state to ‘Activate’ immediately.
6. ‘Activate’ button: By clicking on this button the group will be activated. Also, the button changes the state to ‘Deactivate’ immediately.
7. ‘Posts’ tab: Displays names of the members, and the subject of the post which is shown in the ‘Description’ column, the date and time of a particular post, and the status of the post i.e., whether the post is edited or deleted, disable and delete buttons have also been provided.
8. ‘Members’ tab: Displays names of the members and their respective designations, their roles in that particular group, the actions column allows you to appoint/remove members and block or remove them.
9. ‘Blocked’ tab: Displays members who have been blocked.
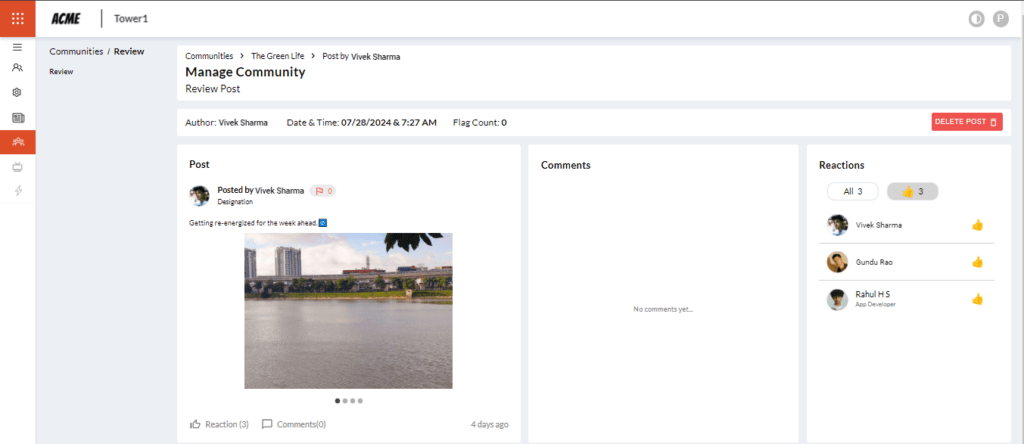
When you click on a particular member of a group you will land on the ‘Review Post’ page. See the screenshot below.

The page contains the following:
1. The page displays the name of the member, the date and the time, the flag count, and the ‘Delete Post’ button.
2. The post section displays the name of the member, designation, message, uploaded media, comments and reactions.
3. The comments section displays all the comments of the members, displays time, and allows users to disable or delete the post.
4. The reactions section displays the names of the members and their designations and also the likes, favourites and dislikes.
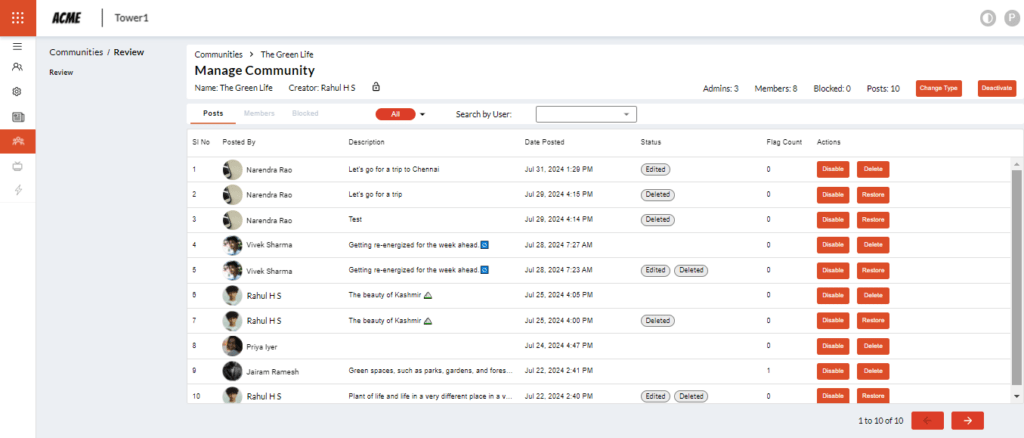
When you click on the ‘Members’ tab of a group you will land on the following page as seen below.

The page contains the following:
1. The page displaying the name and designation of the member, and their role in the group
2. An option to appoint or remove an administrator, block an administrator or a member, and also a member or administrator can be removed from the group.
The ‘Blocked’ tab will display the name and designation of the blocked member, their role in the group and the ‘Unblock’ button.