Visited 61 times, 1 visit(s) today
May 2, 2024• Staff Writer
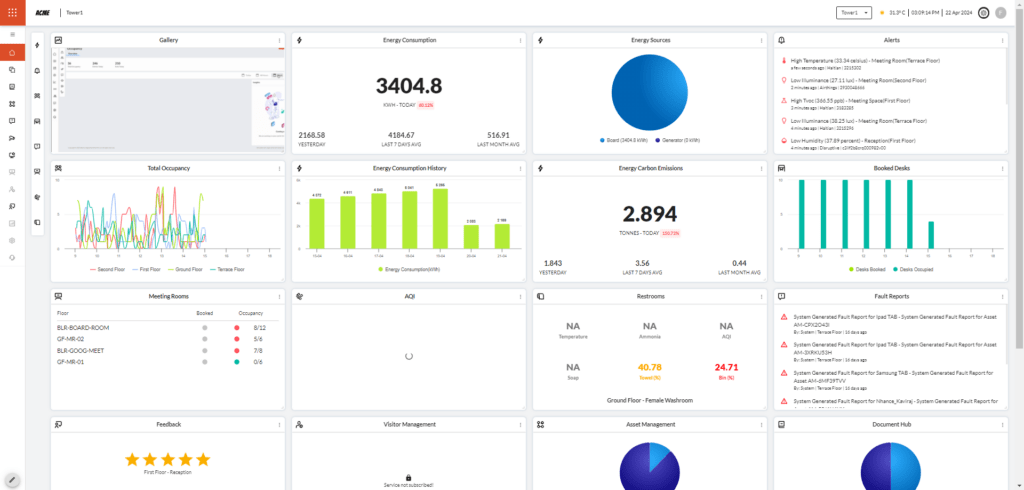
The dashboard consists of multiple widgets, a.k.a. cards, displaying information on the various components of the twin.
These cards can be resized by clicking on the diagonal arrow at the bottom-right corner of the widget and dragging the mouse to wherever required.
The widgets can also be moved by clicking on the title bar of the widget and dragging them around.
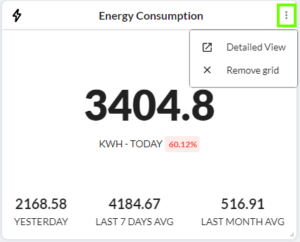
1. The widgets have 2 options in their kebab menu (marked in green):
1.1 Detailed view – Clicking on the Detailed View takes you to a more detailed view of that component.
1.2 Remove grid – Clicking on the Remove grid option removes the component from the dashboard. It can be revived back by resetting the dashboard or adding new widgets, in the Customize menu.
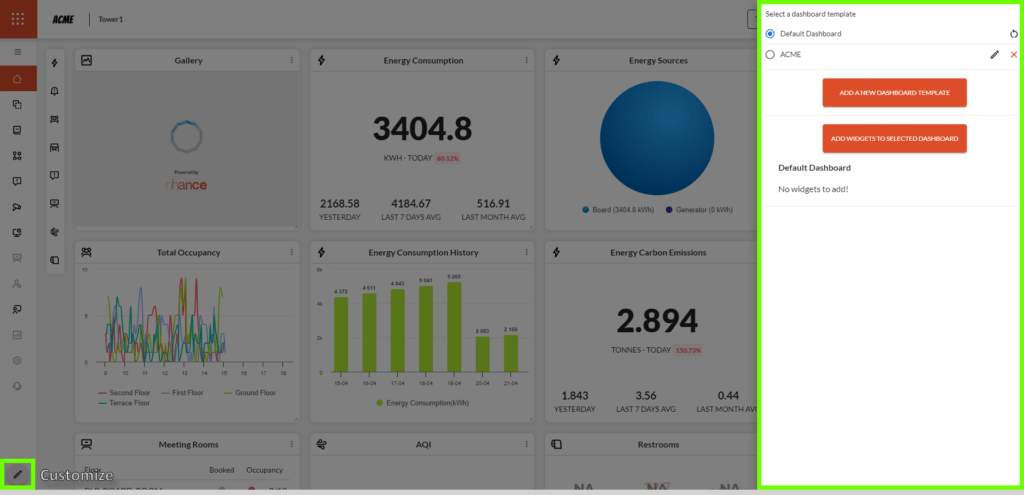
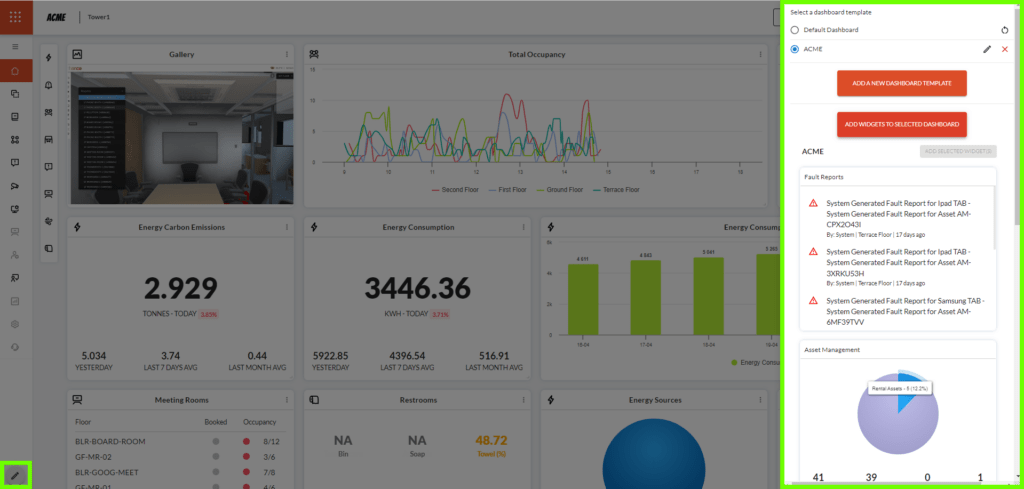
The dashboard allows you to customize the dashboard and manage templates from a customization menu. This menu also allows adding or removing widgets from the dashboard and saving them as templates.
You can also reset the dashboard to its defaults if required.
Note: The widgets can be reset by resetting the current dashboard in the Customize menu.
Selecting a dashboard template from the list of dashboards displays content chosen for that template.
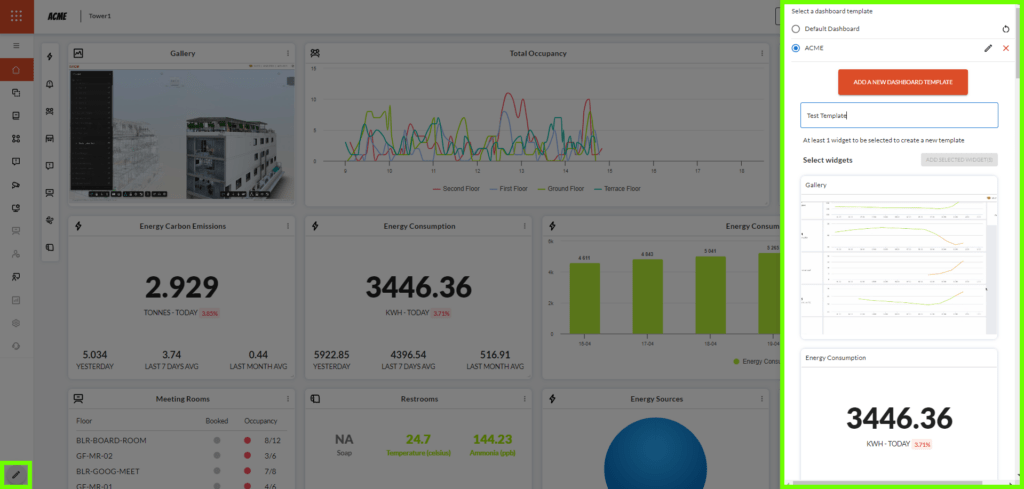
New dashboard templates can be added by selecting the ‘Add New Dashboard Template’.
You can select the widgets the new template should consist of at the time of creation.
2. Enter a name for the new dashboard template in the input text field.
3. Select the widgets to display in the new template and click the ‘Add Selected Widget(s)’ button.
Selected Widgets/cards can be added to an existing dashboard template by selecting the ‘Add Widgets to Selected Dashboard’ option. Select the dashboard to add the widgets to and select the ‘Add Widgets to Selected Dashboard’ option.
4. Once the selection is complete, click the ‘Add Selected Widget(s)’ button to add them to the selected dashboard.
113, 2nd Cross Rd,
East of NGEF Layout,
Kasturi Nagar, Karnataka,
Bengaluru – 560043